Feeds:
Posts
Comments

Archive for the ‘maintenance’ Category

… “I made a lot of progress today! I was going so fast that I almost passed a snail trapped in a puddle of molasses!”

Well, it seems that way. I started this oil change on November 8th and as I sit here in the quiet solitude of December 23rd, enjoying the last smidgen of calm before the holiday storm, I can reflect back on the intervening days and weeks and honestly wonder just why this is taking so daggone long. What it comes down to is a series of distractions combined with unforeseen delaying events. Distractions arising from holiday preparations and the seductive Siren call of the RV-12 project have certainly played a role, but the fiasco of the broken Subaru has played a part as well. And, truth be told, there was a bit of decision making to be done too.

As it stands today, the Subaru is repaired, the cowls are repaired, albeit without the final finishing step of applying paint to the repaired areas, and the decision has been made regarding how (and keep in mind that ‘if’ was a player as well) to replace the faulty attitude indicator.

The Subaru needed a new head gasket, but for a couple of reasons actually received two new head gaskets, a new timing belt, new spark plugs, and a new thermostat for the radiator. Plus fluids. Those aren’t exactly cheap either, you know. Geographical challenges and some minor maintenance delays stretched the job out for a couple of weeks, but it’s all done now and other than a lingering scent of baked antifreeze, everything seems to be working just fine. The car has over 80,000 miles on it and this is the first real maintenance it has needed, so I can’t really complain.

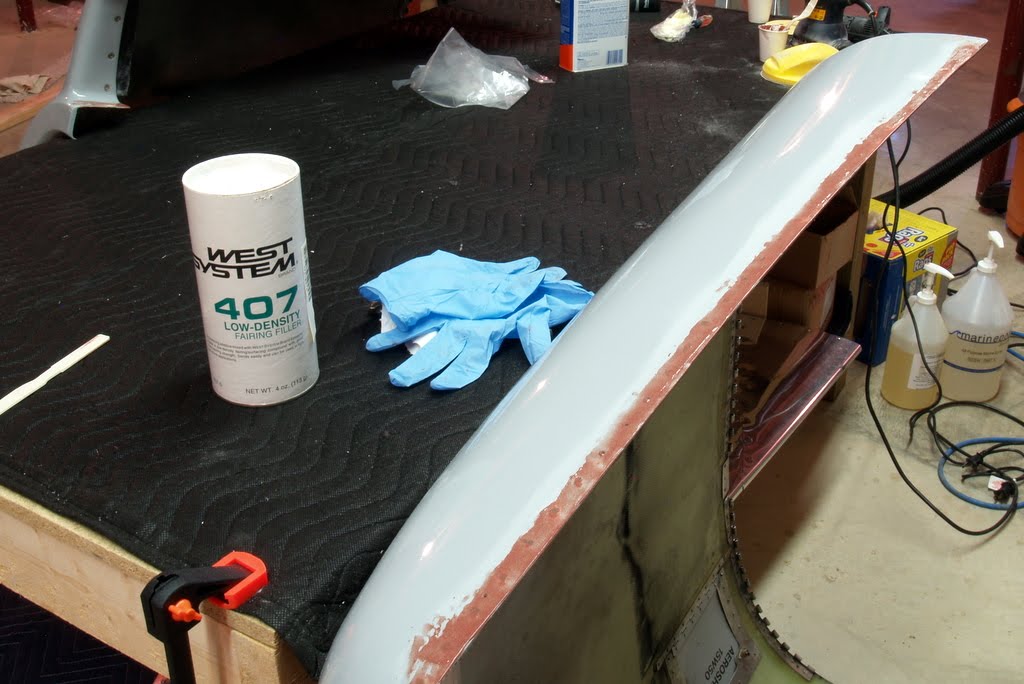
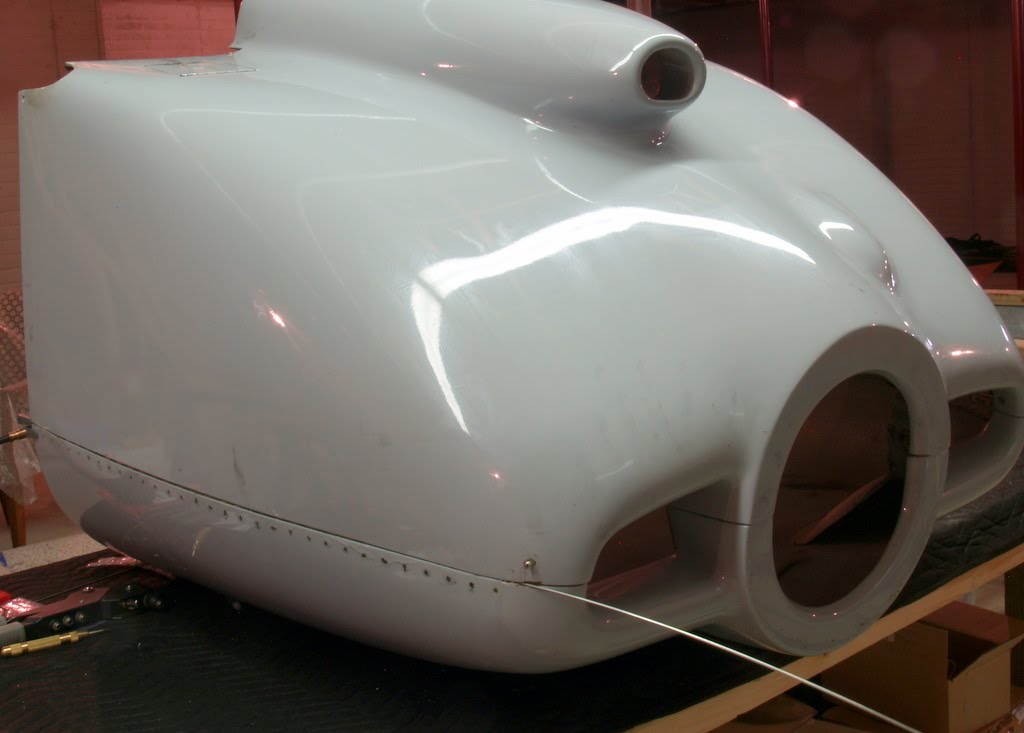
The cowls are primered on the affected areas, but final painting will have to wait for the more conducive temperatures of Spring for final painting. Having been once burned, though, I’m naturally twice shy on the topic of hauling them out to my brother for painting. A pretty clear Karmic message has been sent: perhaps I should bite the bullet and learn how to operate the painting equipment I own. I have an air compressor and a Harbor Freight HVLP spray gun – I ought to see if I can learn how to use it.

In the meanwhile, I bought myself some time on the issue of the attitude indicator by removing the vacuum pump. Following my inimitable method of making big decisions (which is to muddle about making small decisions until I have painted myself into a corner), I spent quite a bit of time working with my mechanic to make sure every delaying tactic was both safe and useless.

The decision to be made was, of course, whether to replace the broken vacuum-powered, mechanical attitude gyro with a similar item, thereby running the risk of breaking another $700 gyro, or to upgrade to a solid state electronic model and slightly more than twice the cost. The higher cost option would normally have been the obvious solution because of the improved reliability combined with equally improved utility, but I can’t help spicing up the decision making process by adding in the question of how long I will own this plane. But… a nicer panel is definitely an eye catcher at resale time too.

The state of play was a removed attitude indicator with its vacuum lines dangling in open air. The directional gyro had also been removed to allow access to the AI, so it too was dangling behind the panel. My initial thought was to reinstall the DG and fly without the AI until such time as I could decide on the long term course of action. My intuition told me that leaving the AIs vacuum limes sucking unfiltered air was a bad idea, and this was confirmed by the mechanic. He suggested plugging the lines with some plastic caps. Easy, right?

As I was lying on my back putting the caps on the lines, I realized that I had no stomach for putting the DG and all of the other associated pneumatic plumbing back into place just to remove it again when it came time  to replace the AI, so I went ahead and completely removed it too. That left me with a bit of an issue: I could plug the vacuum lines for the DG too, but then the vacuum pump would be sucking on a pair of plugged lines. That didn’t seem like a good thing.

At that point, I decided that the only real answer was to just remove everything and consider the question of what to put in the panel to be decided in favor of the electronic unit. And by everything, I mean the engine-mounted vacuum pump, the filter, and the tangle of hoses that connected it all. This decision, naturally, required another consult with the mechanic. Removing the vacuum pump would leave gaping wounds in the back of the engine and in the firewall. And there was also the question of how to remove the vacuum pump. It’s located on the back of the engine in a position that precludes easy access to one of the four nuts that hold it on. In fact, in this era of pop rock bands having numeric names like Third Eye Blind, Five for Fighting, Maroon Five, and Avenged Sevenfold, I thought Three Nuts Easy would make a good name for an emerging group. To resolve the question of how to remove Fourth Nut Difficult, I again pestered the local mechanic.

“Well, we have a fancy wrench for that, but you could just use a mallet and a screwdriver.”

Now, it may have been my imagination, but I’d swear he then adopted the waiting pose one gets when one has thrown out an answer and is expecting a “Huh??” in response. Sorry, though: it was not forthcoming. I knew exactly what he meant.  Back in the Good Ole Days of my military servitude, I actually spent quite a bit of time working on airplanes. There were various infamous areas on both of the airplanes (I worked on SR-71s and RF-4Cs) I helped maintain that were either designed by diabolically clever sadists or egregiously incompetent engineers. In a word, they were what can only be described as inaccessible. While it was frowned upon, we had a Don’t Ask, Don’t Tell maintenance technique that involved placing the end of a flat blade screwdriver on the face of a nut (or in a groove on a cannon plug, for those of you that know what a cannon plug is) and tapping (that’s a liberal stretching of the word ‘tap’ – in many cases ‘hammering’ would have been more appropriate) until it was loose. So, instead of the-secretly-hoped-for “Huh??” the reply was, “Oh, ok.”

That left the issue of the gaping hole on the back of the engine (the problem of the hole in the firewall having been solved through the simple expedient of not removing the vacuum regulator that now benignly sits in the hole enjoying its forced retirement) which was cured with the placement of a charitably gifted metal blocking plate:

If nothing else comes of all this, it will now be orders of magnitude easier to change the oil filter. There’s some irony involved in that if you think about how all of this transpired.

Plus, the plane will be just a wee bit lighter. Here’s all of the stuff that I don’t have to carry around anymore:

And what do you do with a broken old attitude indicator? If you’re the curious type, you do this:

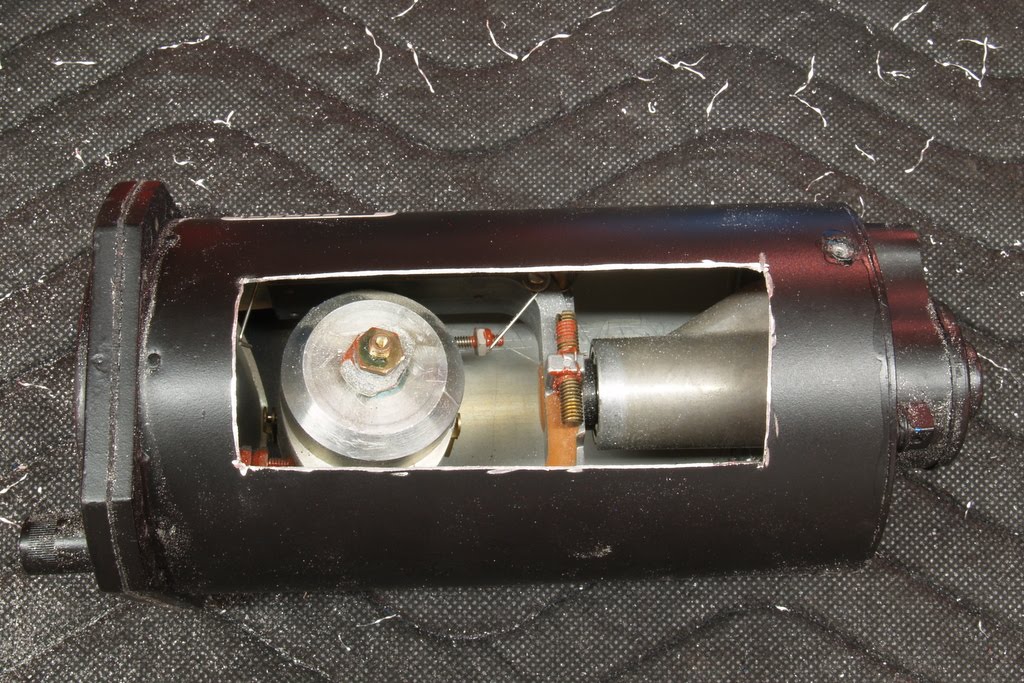
Oh, don’t criticize me. You know you’ve always want to see the innards of one of these things. Besides, it will make a good desk-oration at work.

So, what’s going to eventually go into the panel? One of these:

And why ‘eventually’? Because the acquisition price of one of those little guys is right here:

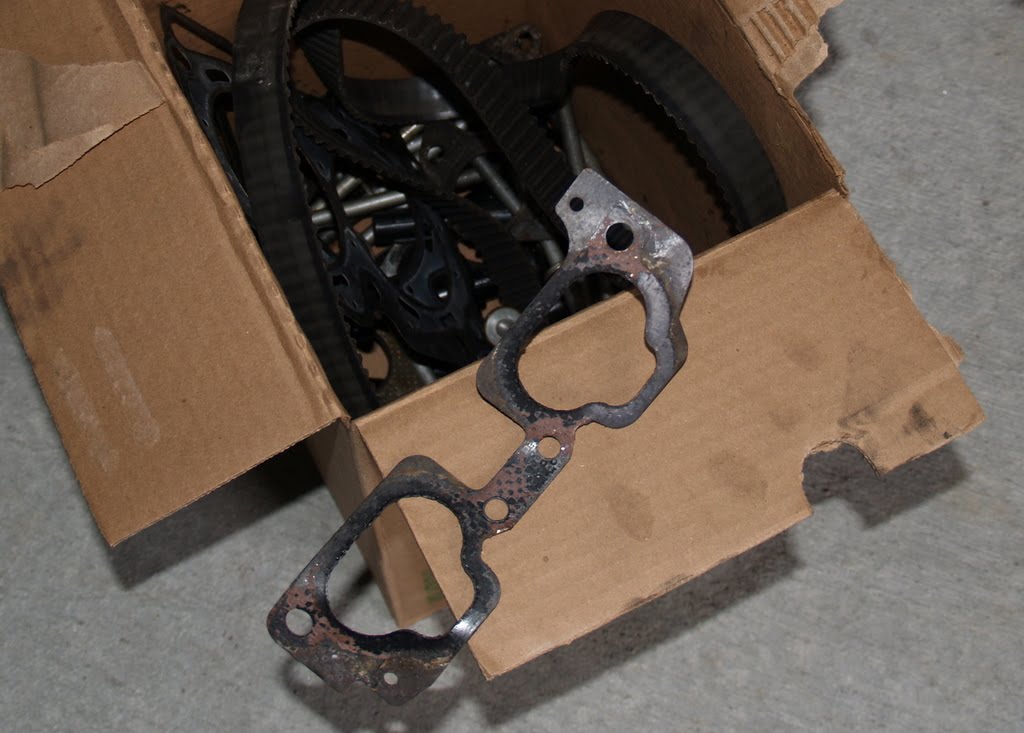
That gasket is the one that was allowing pressurized gas from the combustion chamber(s) to over-pressurize the radiator, thus forcing coolant out of the radiator and onto the rest of the engine. The stuff in the box is all of the expensive junk that was protecting the corrupt gasket.

It’ll take a little time to recover from that, Xmas, and the property tax bill that’s due in January. Still, it’s good to have the decision finally made.

Read Full Post »

In a tight spot in the RV-6

Remember this?

That’s my broken attitude indicator. I decided that since the weather today was offering a balmy 30F temperature to work in and the airplane is still broken while waiting for the cowls to return from the paint shop, I’d go ahead and remove the broken attitude indicator. I still don’t know if I’m going to replace it, but I have a new argument in the “against” column: it took two and a half hours to remove it. And that’s the easy part! I’m not proud of the language that it took to get the old one out (nor am I ashamed of it – I was provoked!) but I’m preemptively appalled at the colorful linguistics that will be surely be required to replace it.

That and the $500 for a new one.

Still, there’s resale value to consider.

Decisions, decisions.

But I can’t stress enough just how horrible it is to work behind the panel on an RV-6. Cramming myself into the tiny space down by the rudder pedals to reach up behind the panel makes even a small-ish guy like me feel as big as an NFL offensive lineman. That’s not nearly as cool as I had thought it would be. In fact, it sucks.

Maybe I’ll violate the code and hire someone to do it.

Decisions, decisions.

Read Full Post »

Worst. Oil Change. Ever.

It felt like it should be the final stretch of getting the saga of the oil change completed. The cowls have been repaired, test fitted, and readied for painting. Once painted, we’re finally only a 15 minute installation on the plane from being done. Bet here’s the thing about the final stretch (and you pay very close attention to the next race you watch to test the veracity of this observation if you don’t believe me): it’s a horrible time to change drivers.

The thing is, I have neither the equipment nor the expertise to paint the cowls. Nor the wheel pants, which is why they’ve been painted with rattle can primer for the last three years. Fortunately, I’m related to the Chief Mechanic at the 8105 Repair Shop and he knows how to paint. I figured I’d just drive the cowls out to his shop and have him paint them up. How hard could that be? For me, I mean. Drive ’em out, drop ’em off, and pick them up when they’re done. Piece of cake!

The cowls and wheel pants took up every cubic inch of free space in my suited-more-for-hauling-groceries Subaru Forester, leaving room only for a single pilot. No problem – this was an out and back trip and not necessarily an opportunity to get some road miles for co-pilot Egg. Going solo lets me set the schedule, so I pulled chocks little before 0800. It’s an easy drive that early in the morning and the Across the Universe CDs (highly recommended) made for a relaxed trip.

Well, until I got there, anyway.

As I pulled to a stop in the visitor parking at the Schmetterling Aviation World Headquarters (which is conveniently adjacent to one of their other holdings, the 8105 Racing shop, which is itself co-located with the 8105 Repair Shop that was going to do the cowl painting), the overbearingly rancid sweet smell of antifreeze emanating from the front regions of the normally ultra-reliable Subie hinted that there may be something amiss in the Department of Automotive Propulsive Force, or “the engine” as it’s called in the vernacular. More specifically, in the Thermal Protection Unit.

There is an age old ritual for situations like this that we’ve all inherited through either or both of parental example or aging Hollywood movies: we raise the hood. Which ritual has become increasingly difficult to perform over the intervening years with the introduction of multiple release latches located (hidden?) both inside and outside of the passenger compartment. Needlessly complex, in my considered opinion. And deliberate besides. It’s the automotive designer’s way of telling us that we ought just stay the hell outta there and leave it all to the specialists. Always the contrarion and as diabolically clever as a monkey, I defeated their defenses and opened the door to the vault.

It was ugly. The overflow bucket from the radiator was frothing like a rabid Pit Bull and the rest of the engine was covered in spots of flung Pit Bull spittle. Your name doesn’t have to be Shelby to figure out that it really isn’t supposed to look like that. Or smell like it, for that matter. It smelled like a gallon of Log Cabin faux-syrup had exploded onto a burned skunk. Trust me, that’s not a taste sensation we’re going to be seeing in the snack aisle at the 7-11 anytime soon. Peee-yooooo.

Well, I was headed to the shop anyway, right?

The news at the shop? Pretty good, but only in aspects unrelated to the car. That particular piece of news was pretty bad. Ten Bills O’ Bad:

“Blown head gasket. Might was well replace both while we’re in there. And the timing belt, too. When can I start?”

Well, there’s the whole question of transportation home, right? I had always thought this kind of thing would happen with the airplane. Fly somewhere, land, find out that we’re not flying back. Rent a car, drive home. Sell airplane where it sits. Well, no, probably not that last part, although I can easily imagine being tempted at this point in the never-ending oil change. In this case, I was able to borrow the CEO’s personal sports car for the week. I gotta tell you, it’s a very nice ride. I still have to look at the owners manual to verify this, but I’d swear that the CD player automatically reduces its volume when you slow from highway speeds (which are limited only by the speed rating of the tires) to a stop at the exit. Incredible!

While at the shop I also retrieved my Walther P-38 that I had asked the Chief Mechanic to take a look at. It was jamming on every second or third round, and that takes a lot of the fun out of shooting it. Although… it probably helps control ammunition expenses. Either way, the gun needed some work.

It looked like a brand new gun. I don’t think it has been that clean since it rolled off of the assembly line 50+ years ago. And the jamming problem had reportedly been resolved. I was anxious to finally shoot it with it functioning correctly, so I asked if there was a target handy that I could toss a few shots at.

“No, not that mangy cat, please. An inanimate target would serve better. Not through any love of cats, mind you. I just figure a stationary target will better suit my limited aiming abilities.”

Because, you see, I’m a horrible shot. Not so with the Chief Mechanic, who’s quite good at it. Once again pointing out the vagaries of genetics. This is the nature of the normal love/hate relationship between siblongs, I imagine.

“Here, I’ll take this brick down to the field. You stay up here on the driveway and take a few shots at it,” was his suggestion.

Thinking that surely (stop calling me Shirley) he was yanking my chain, I follwed him halfway down the hill.

“What are you doing down here??”

“I thought I might like to shoot at it from somewhere where I could actually see it,” I replied. Quite truthfully, too.

Five shots, five misses.

Great glee from the audience.

A “you do it” challenge from me.

One shot. Nothing left of the brick but red dust. Roughly the same left of my self esteem. Oh, and from the top of the hill, naturally.

Like I said: love, hate.

Read Full Post »

… still is not done. But as of tonight it is just a little bit closer. Tonight I test fit the repaired cowls and they fit!

Over the last few days, I’ve been working on finishing the refill of the previous rivet holes. That involved grinding off excess epoxy with a Dremel tool, adding a fill layer of epoxy thickened with filler, and sanding off most of that layer to leave a smooth finish. It actually looked pretty good:

Yesterday I countersunk the rivet holes for the flush rivets that would be used to hold the new hinge strip in place. That turned out to be surprisingly easy to do, but even more surprisingly hard to do well. The problem turned out to be that it is so easy to cut the countersink hole in the fiberglass even by manually turning the bit that it is also disconcertingly easy to drill too deep. I didn’t know that, of course, until I had squeezed in all of the new rivets and sprayed on a coat of primer.

Primer is like the mean mother-in-law of paint: it revels in ostentatiously demonstrating your weaknesses. I swear, that row of rivets looked so bad that it was almost like a satirical parodization* of British dental work. Having had a night to get over the initial chagrin, though, I think a little bondo or a few thick coats of paint will serve to hide my shame. Which, after all, is all you can ever really ask for from life, right?

My biggest worry was that nothing would line up when it came time to mount the cowls to the plane. Co-pilot Rick drove down to the airport in the crappy wet weather we’re currently having (the weather can sense that I might soon have a flyable airplane and wants to get a few early kicks in) to help me to do the test install. Everything fit just fine, and in certain aspects the cowls went on easier than ever before. That was a huge relief!

The cowls are back off of the airplane now, awaiting a trip to the paint shop.

* not a real word, at least according to Google, but it ought to be!

Read Full Post »

Sunny and 50 today

Thus proving that my weather talisman is still demonstrating a preternatural efficacy in preventing the type of weather that wouldn’t frustrate me. I’m still waiting for the rivets I need to attach the new hinge piece. There was still a little prep work to do, so I knocked that out this morning. I borrowed Co-pilot Rick’s Dremel tool to grind down the bumps left by my overly zealous application of epoxy to fill the old holes. The worked great, but there was no way I was going to get a nice, smooth finish after doing that. I still have quite a bit of epoxy filler left over from filling the pinholes on the new wheel pants I installed four years ago, so I mixed up a batch of paste and smoothed it along the edge. Was that later cures, I’ll sand it smooth and put a skim coat of unadulterated epoxy on top of it to protect it.

Then it should just be a matter of countersinking the holes for the rivets and putting it all together. For now it will have to get by with a coat of rattle can enamel paint. It will never look as good as it used to, I’m afraid.

Read Full Post »

It isn’t necessarily going to end well:

Just call it a hunch.

Read Full Post »

Cowl Update

The halves are joined!

Now I have to let the epoxy that I used to fill the holes cure for a few more hours, then figure out a way to drill the new holes. I want to drill from the inside out, but that will make it hard to hot the old holes. There’s no requirement to do so, of course, but it seems like it would be cleaner looking. I don’t want to go from the outside in because it will push the hinge away and make it next to impossible to drill a round, accurately placed hold. Maybe I could do just a few inside outs and count on clecos to hold the hinge in place for the outside in drilling, but I’m dubious on a favorable prognosis.

There also quite a bit of epoxy that needs to be cleaned up on the holes, and the original installation of the hinge had 1/4″ or so holes drilled in it and epoxy used to help the rivets hold it in place. So…. good progress, but plenty more to do yet.

Read Full Post »

Taunted by the weather

It would have been a great day to fly. That’s all I can say about it; any more than that will require to think about how unseasonably beautiful our weather was today and likely will also be tomorrow. It’s like getting a two day reprieve from being sent to a Siberian gulag but having to spend it fixing your plumbing. In may case, it is still the cowl that’s keeping me grounded.

I started working on it this morning, though. The first thing that had to be done was the grinding away of the old epoxy that had apparently been used to aid the rivets in holding the hinge strip to the cowl. This step was quite easy, mostly due to a convenient tool crossover. I used the orbital sander that played such an integral role in the building of the kayak:

I also had to drill out the rivets holding in the remaining piece of yet another broken hinge. It’s bad enough that I have no idea how this one got broken, but I also have no idea how it got broken this badly:

On the plus side, it was far easier to drill out the rivets from the inside out than it had been to do it from the outside in like I had to do with the other hinge:

Not that it matters because they’re going to get filled with epoxy anyway, but the holes got far less elongated:

In yet another beneficent crossover, leftover materials from the kayak were already on hand for the filling of the old holes with new epoxy:

The pumps on the epoxy containers hadn’t been exercised for a couple of years so I had to purge them, clean them, and re-prime them before dosing out a bit of epoxy to suck into a syringe. My first idea was to clamp the new hinge in place and use it to hold the epoxy in the holes:

That didn’t work as well as I had hoped it would so I had to remove the hinge and try masking tape instead:

That seemed to work a lot better. Now it all needs to sit overnight curing.

I’ll check on it second thing in the morning. What will I do first thing in the morning? Well, more than likely I’ll be outside shaking my fist at a tauntingly blue sky.

Read Full Post »

At least the oil is drained

It was a beautiful weekend with weather as foreign to an Ohio November as parrot meat to a polar bear. Temps hovering near 70 and clear, calm skies. So where was I? Still waiting for new hinge strip material to fix Papa’s cowls.

With weather that nice, though, any time spent at the hangar is good time. I went out and finished draining the oil out of the oil filter. That’s typically a messy job, but with time to spare I was able to devote sufficient time to the task to get it done without spilling a single drop. That’s not as easy as it may sound. To remove the filter without spilling any oil down the back of the engine or the front of the firewall is a tightly choreographed effort involving an electric drill, a modified water bottle, and a lot of rags. It’s worth the effort, though, because any oil spilled will eventually end up spread down the belly of the airplane. It is NO fun at all cleaning the belly, no matter what the weather.

While waiting for the oil to drain, I removed the wheel pants. That too is a persnickety job that I try to avoid whenever possible, but the tires are soon (assuming I ever fly again) going to be showing thread, at which point they will have to be replaced. Besides that, the annual inspection will be due in just a couple of months, so I figured I pull the wheel pants off while the hangar floor was at least somewhat warm and just leave them off until after the annual.

The rest of the weekend was spent doing various winter preparation chores and working on the RV-12. It’s funny that the RV-12 project was intended to fill the time in the gawd-awful winter months when it’s too cold and/or nasty to go outside, but I enjoy the “work” so much that I spent most of a beautiful weekend in the basement building a stabilator. I only went outside long enough to go to Lowes to buy a snow blower. With the weather being what it was, there wasn’t much competition to buy a snow blower; those procrastinators will find that I got there before them.

Naturally, they will get the last laugh when it doesn’t snow at all this year.

Read Full Post »

After stressing about it for a few days and gathering opinions as to what to do from other RV owners, it came down to the fact that the only way to get the cowl off of Papa would be to drill out the rivets that hold the hinge in place. Naturally, as this would be the most destructive and invasive way to do it, I was very reluctant to do it. After a period of energetic loin girding, I grabbed the drill and a #41 bit and went at it. An hour (and a few choice cuts on my fingers) later, the cowl was off. And, I’m sorry to say, somewhat maimed. I knew that was a very real possibility, though, so selected the top cowl to be sacrificed since it’s easier to transport to a more comfortable location to be worked on.

It turns out that it’s harder to drill a rivet out of fiberglass than it is to drill one out of aluminum. I’m sure this is almost universally true, but it becomes even more true if you can’t really see exactly where the rivet is. If it was under a thick coat of paint, like. Adds to the challenge, that. Some of the rivets came out peacefully, others barricaded themselves in and hoped I wouldn’t call in the SWAT team. They underestimated my resolve, probably unaware of the girded loins that I was bringing to the battle. And a #41 drill bit.

The difficulty in drilling out the rivets in fiberglass is that they are surrounded by a much softer, pliant material. If the bit got even the least bit off the center of the rivet, it would take the path of lesser resistance and slice off into the fiberglass. There is no silver lining in that cloud. Not only does it create a messy, large hole in the fiberglass that will have to be fixed (somehow – not quite sure how yet, and my loins are at this point quite ungirded), it also leaves enough rivet in place to maintain a strangle hold on the hinge. Oh, and it also leaves a very sharp edge, perfect for lacerating fingertips if one was careless enough to try to wipe away what looked like paint and/or metal shavings. Let’s just say that if one were to do that, one would later realize just how deep those cuts were when one was slicing onions for dinner. Or trying to type a blog post, for that matter.

As it stands today, the cowl has bigger holes in it than our national budget and the hinge strip is as ruined as Congressional credibility. (Sorry, I had the radio news on – it has the effect on me) I think the cowl can be repaired by filling the holes with epoxy thickened with microballoons, but the hinge will have to be replaced. The hinge material is not expensive, but the job of matching and drilling new holes so that the top cowl will line up with the bottom has me worried. I’ll stew on that for a few days; something will come to me. It always does.

Read Full Post »

Older Posts »