Q: Why will I never fully embrace winter flying?
A: I haven’t the heuvos.
Consider:
Posted in Flying on January 28, 2008| Leave a Comment »
We had a nice, temperate 50 degree day today, albeit with winds at 11 gusting 19. A quick consultation of Al Gore’s “101 Things To Do With Your Global Warming” (#1 on Amazon this week) indicated that the best use of this opportunity would be to go fly, both to get some heat into the engine and recharge Papa’s and my internal batteries. The 11G19 would have given me pause had it not been coming from 190 degrees, only 30 degrees off of the runway heading.
Papa’s battery was a little reluctant to crank the engine, but with 4 strokes of primer and an ever enthusiastic motor, he started right up after three blades. I checked in with the tower and received my taxi directions to the expected runway 22. It was a new voice today, so I was only mildly surprised to receive an unusual query from the tower while taxiing out: “Which direction are you headed?” They usually don’t care about that until I check in for takeoff, but since it was a new guy, I figured it was just his style. I told him that I’d be heading out West, and he replied that “they were painting some precip about 20 miles out that way.” That wasn’t much of a surprise to me considering how cloudy the day was, but it was a bit of a surprise that they had equipment capable of showing it. That’s news to me! It wasn’t a factor, though, since I’d only be flying for 15 minutes anyway, but I appreciated him sharing it with me.
I could feel the wind a bit on takeoff, but even more prominent was the dragging of the brakes as I failed to get my feet down low enough on the pedals. I chalk that up to being a bit rusty, and I think I can blame the same rustiness on my forgetting to turn on the fuel boost pump before taking the runway. These are small things, but a perfect indicator of why I hate going a couple of weeks without flying. That said, there’s more of an excuse for misplacing my big feet than there is for missing a checklist item – that’s what checklists are for after all. Duly noted, and herewith tallied up as a lesson learned/reminded.
We’ve got a nice big high pressure system sitting on us, and the combination of that and the low-ish temps gave me a gratifying 1500fpm climb at 115 mph. I didn’t go very high, though, figuring 3000′ MSL to be plenty for just a few minutes of stooging around getting Papa’s and my juices flowing. I figured I might be in for a bit of a workout on the landing, so I just flew around long enough to regain my feel for flying. You can see that even with the temps today, we’ve been pretty chilly for the last few weeks:
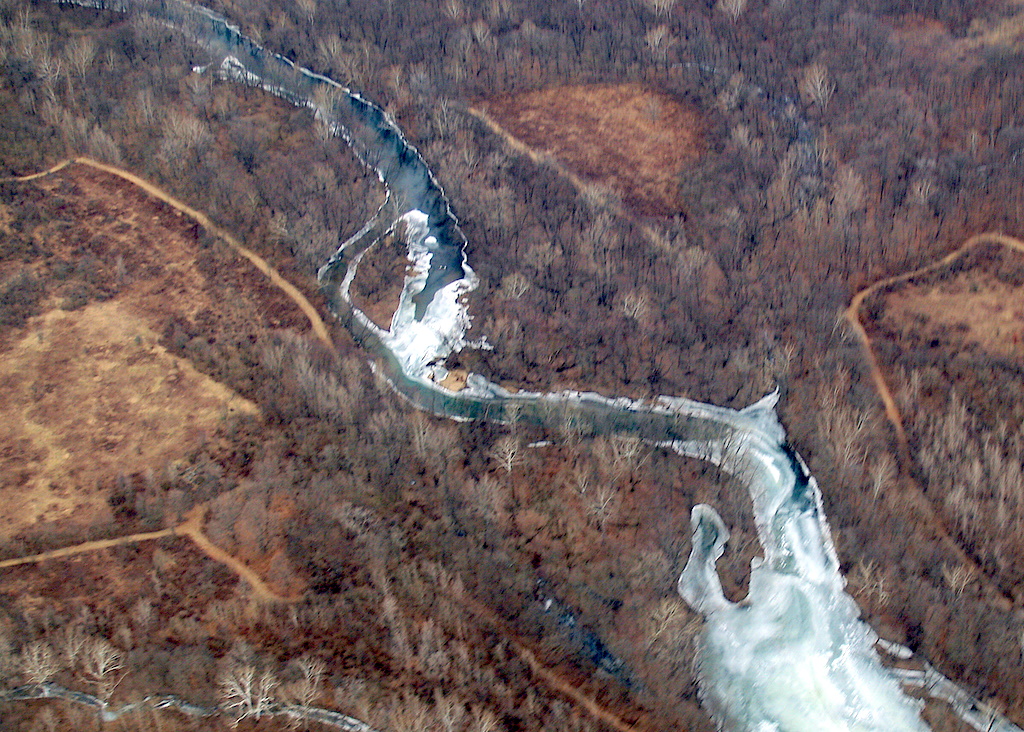
It was pretty gray and dark, so I ended up somewhat out of focus on that picture. I suspect the automatic setting on the camera gave me a pretty low shutter speed and that’s more motion blur than it is bad focus.
As I headed back to land, I tried to think ahead to what it was going to be like. I figured I could expect a pretty good clip on downwind, followed by a long, slow drag down final. Once on downwind, I didn’t even need to look at the GPS to see that I was, in fact, moving right along. I made the turn to right base just past the numbers, figuring to keep some altitude in the bank and fully expecting a relatively steep approach as the wind held my ground speed down. Sure enough, even though every sinew was telling me that I was way high and would end up needing to slip it in, we came down more like an elevator than an escalator and hit my normal landing target without having to shed off any excess altitude. The wind being mostly on the nose like it was meant that I would be able to hold alignment with the runway with just a little rudder, but that I could expect a little uncertainty in the flare. I carried a little poser into a pretty smooth wheel landing, so I must have caught a lull in the gusts.
I as I was pushing Papa back into the hangar, I did a little math in my head. I put .23 hours on the tach, which is just shy of 15 minutes in human time. That’s about two gallons of gas, which is right around $10. BARGAIN!!
Posted in canoe on January 27, 2008| 2 Comments »
I cut out the second upper panel piece of the canoe today, again using the circular saw. This cut did not go very well. The blade kicked back a couple of times, resulting in nasty edges like this:

Again, I’m sure glad I’m not working with $300 worth of wood!!
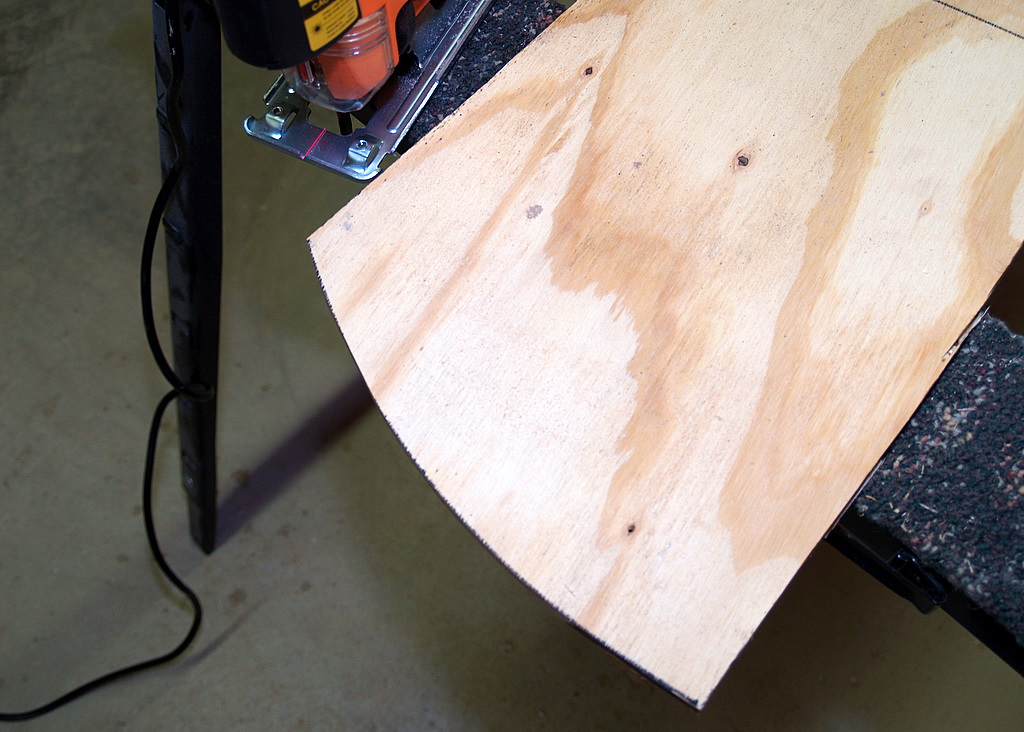
The blade retention nut also worked its way loose again, which besides being somewhat scary interrupts the cut and causes another rough spot in the edge when I start again. When I got to the bow, I just made a rough cut, thinking I’d go back with the jigsaw and clean it up:


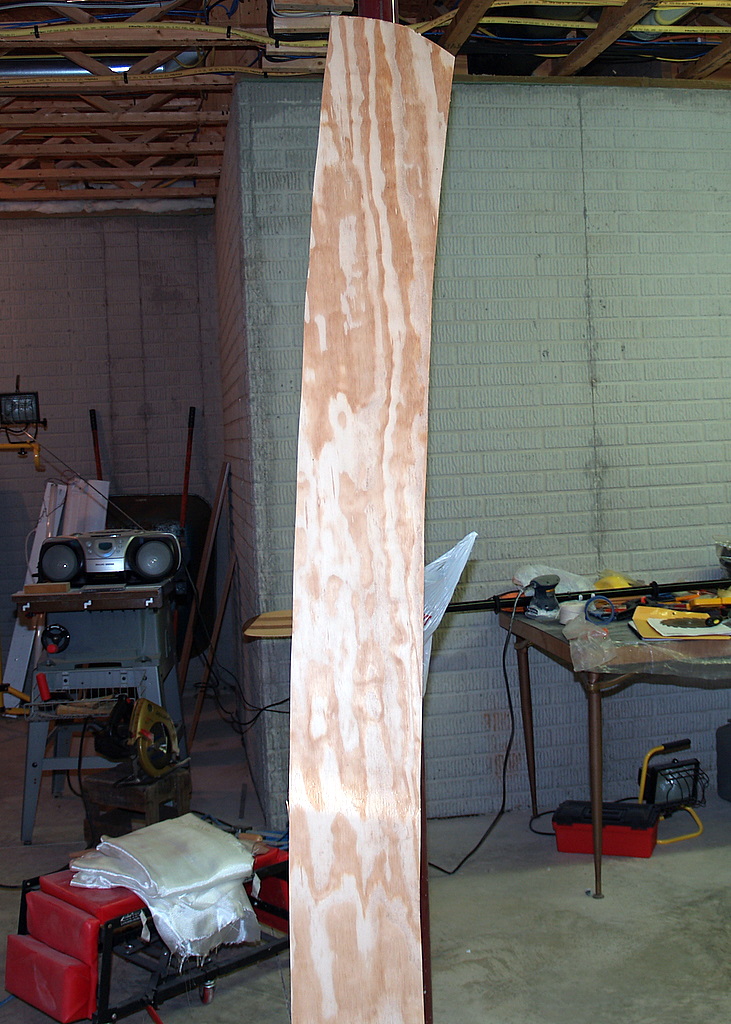
That worked very well:
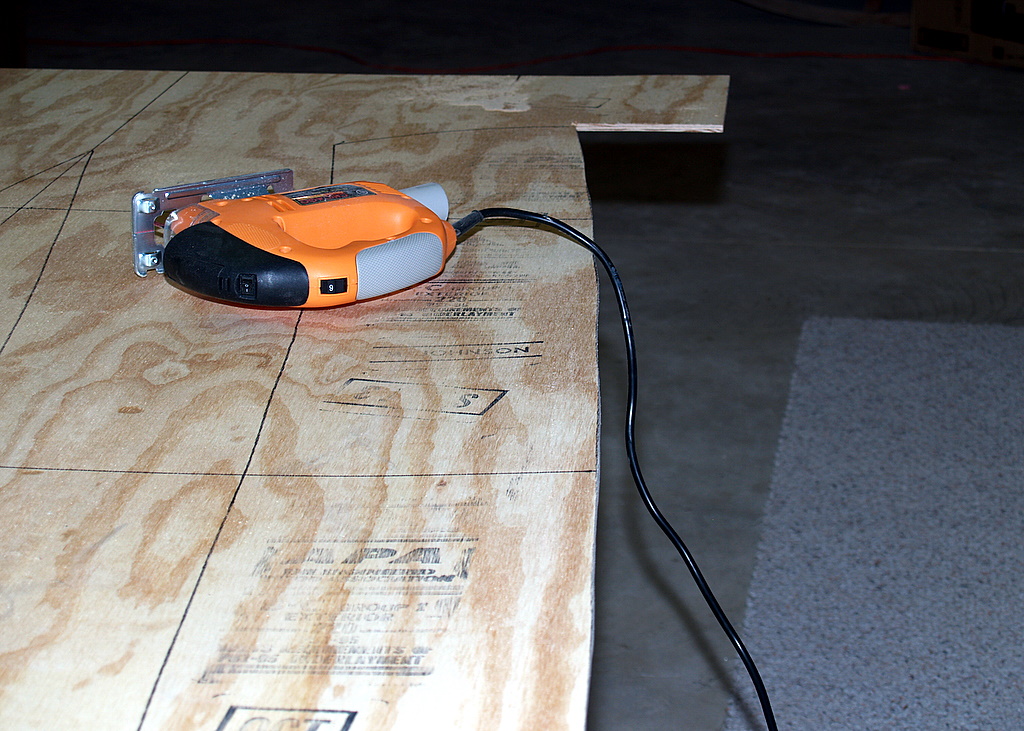
As I was trying to hand sand away the messy edge the circular saw had made, I got to thinking that it really strains credulity that the jigsaw could possibly be any worse, and that I ought to give it a try on the next piece:

As you can see, the fear of a wavy edge was well founded, so I anticipate using every bit of the 1/4″ latitude promised by the designer:
On the plus side, in addition to being marginally easier on my aching back since I didn’t have to get down on my knees and fight my way down the cut with a recalcitrant circular saw, the jigsaw made a much cleaner edge and a lot less of the burning wood stench I get from the circular saw. Well, to be fair, the cleaner edge aspect only lasted right up until I got to the last inch of the bow and the part broke away because I hadn’t thought to go back and support it with the sawhorses as I cut past them:

That was easily remedied, and I learned a lesson about supporting the part better as I cut. Well, partially learned the lesson, anyway, as we will soon see.
The edges from the jigsaw cut are a bit wavier than the circular saw edges, and it remains to be seen if this is an acceptable trade-off for the cleaner, easier cut:

So, what did I mean about only partially learning the lesson of moving the sawhorses to support the areas that I had already cut? Well, I sure didn’t see this coming, did I:
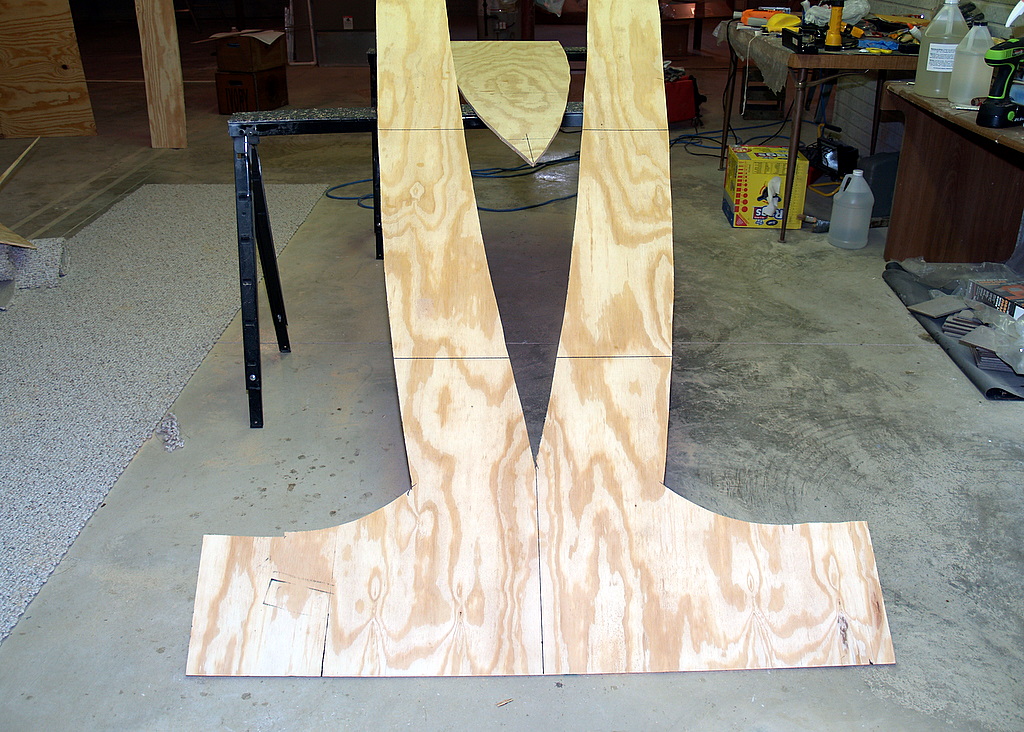
When I lined up the two bottom pieces, I found that something had gone horribly awry somewhere:
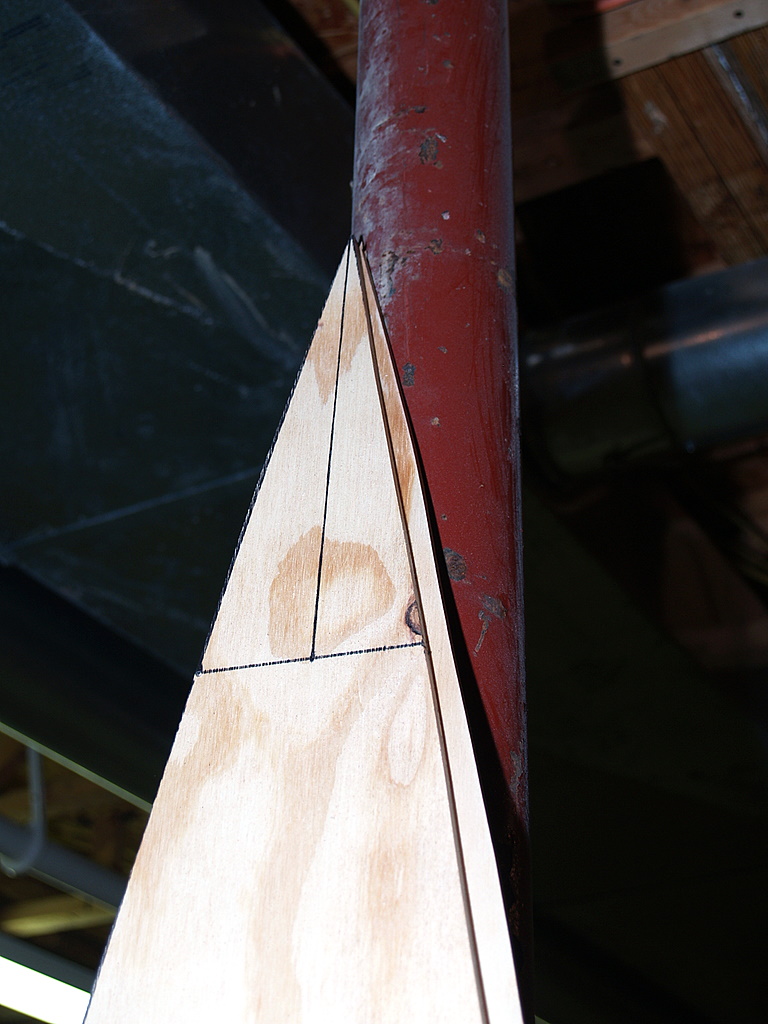
When I flip one of the pieces over they match far more closely, so the error is not in the tracing or cutting, but in the initial measuring or outlining. I can go ahead and build it this way, but the boat will most likely have an inherent banana shape to it. I’m tempted to do it anyway since 1) it’s within tolerance, and 2) just to watch hilarity ensue as Co-pilot Egg struggles to figure out why she can’t keep the darn thing straight! Actually, stretched across a 14′ boat doing 3 mph, I’m not sure it will matter very much. Decisions like this, in a nutshell, are why I should probably never build an airplane!
Posted in Uncategorized on January 24, 2008| Leave a Comment »
After having torn the engine down to the nuts, bolts, and crankshaft level, we spent some time measuring the dimensions of the crank shaft, connecting rods, piston pins, etc. The tolerances are measured down to 1/10,000″ (or .0001″, for those that prefer), but since I consider anything beyond .001″ tolerance as measured with a micrometer to be no more accurate than a random number generator, we were pretty much just going through the motions.
We were able to get the crankshaft and camshaft installed and the crankcase halves put back together before we ran out of class time. Those were the easy parts, of course. Now we have to figure out where all of the little bits go. That’s a daunting prospect!
Posted in canoe on January 20, 2008| Leave a Comment »
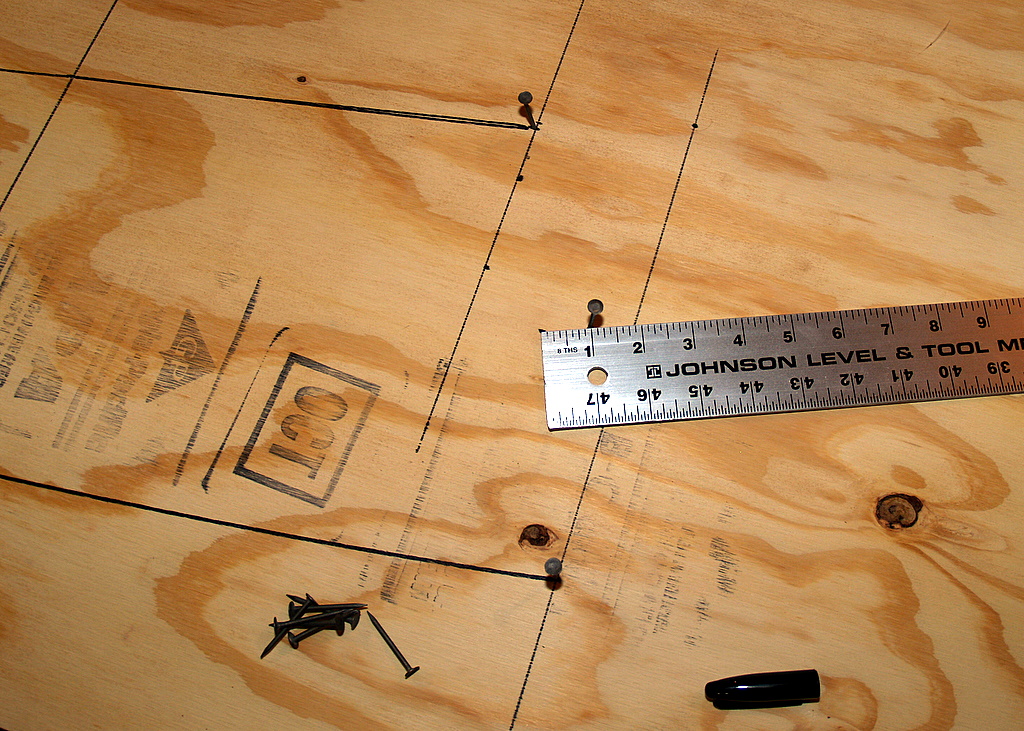
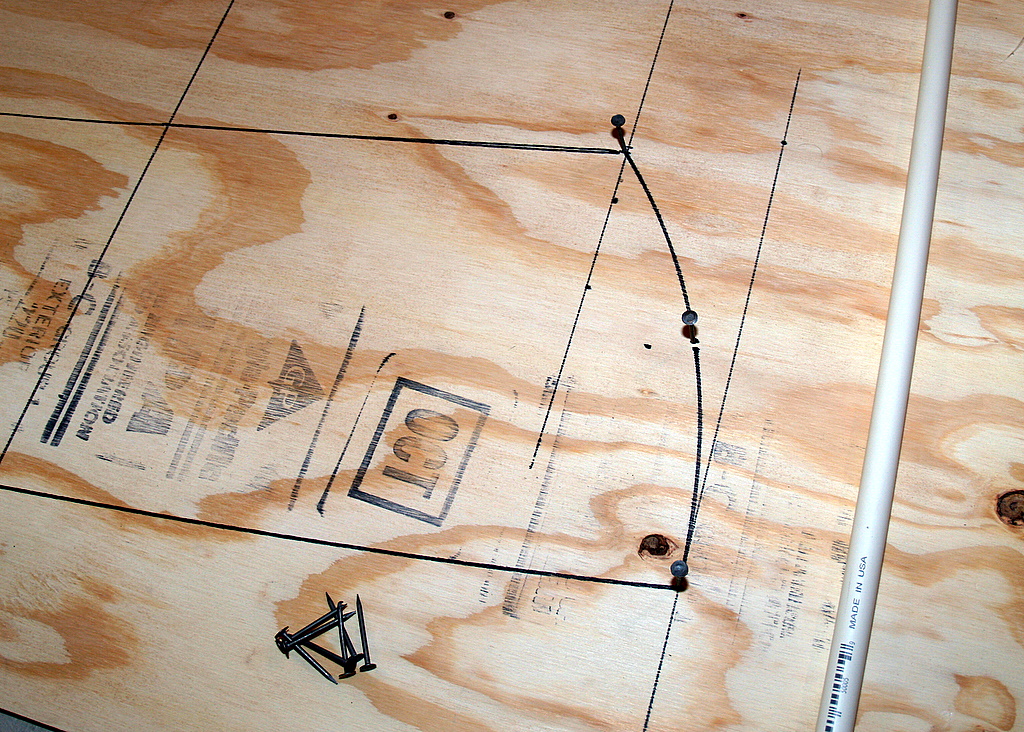
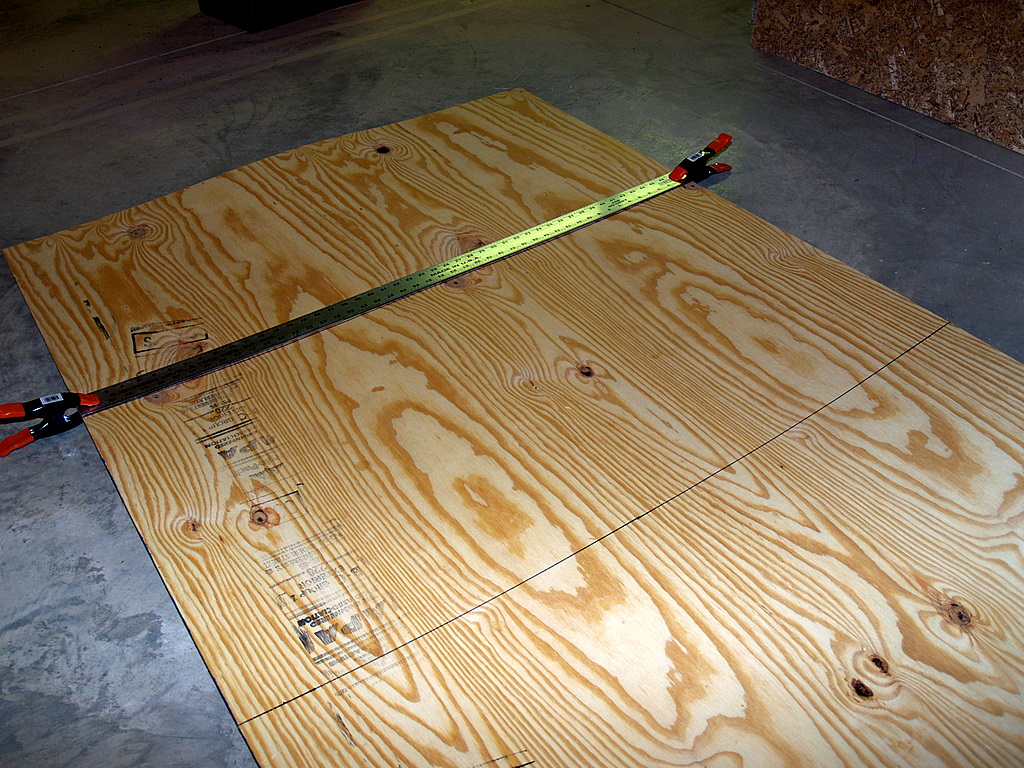
At some point late last night, I woke up thinking that I had better cut the bottom piece of the boat before I cut the second side piece. The bottom piece is centered in the 4′ x 8′ piece of plywood, and the measurements are from the long edges. If I were to cut the second side piece, the edge that I need to measure to the center piece marks would be gone. With that in mind, I laid out the center piece marks and drew the curved lines:
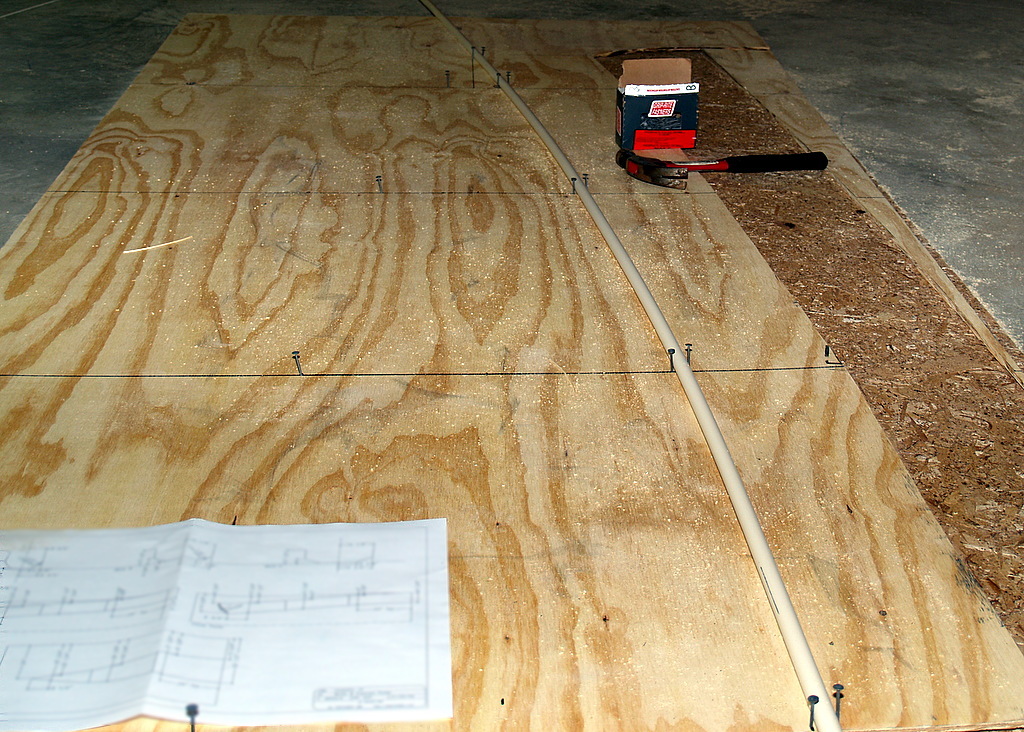
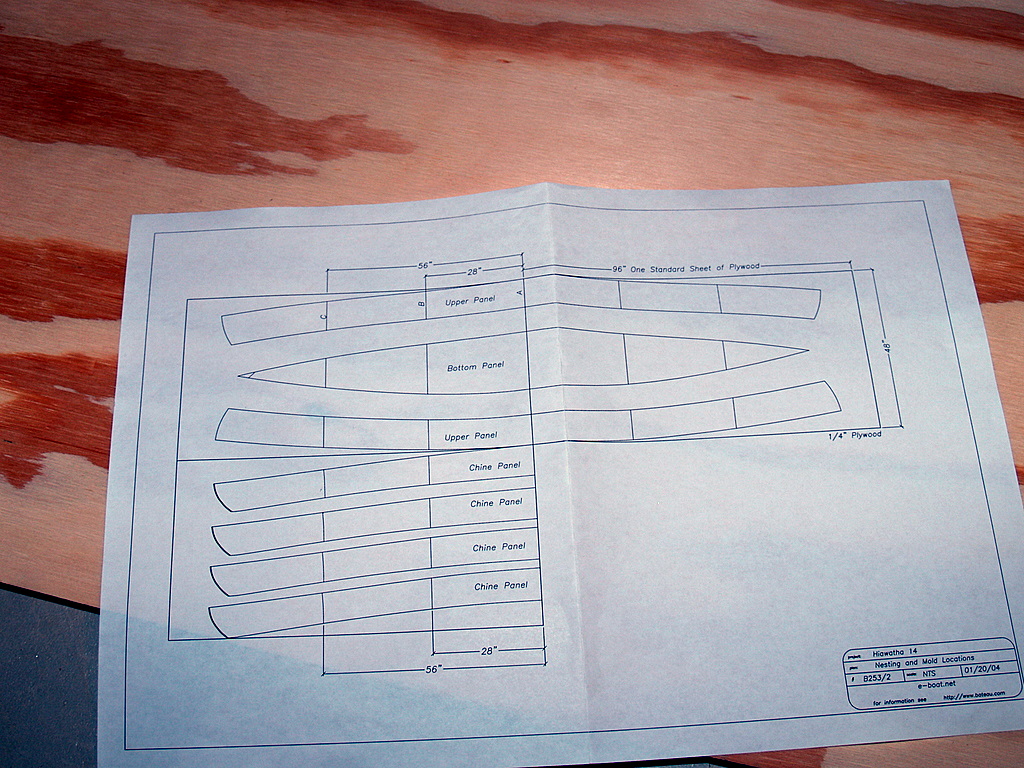
(Note that I deliberately blurred the plans in this picture. I got to thinking that Bateau wouldn’t be thrilled with having high resolution pictures of their plans on the internet)
The cutting went a little easier this time since there were no real tight turns to make:
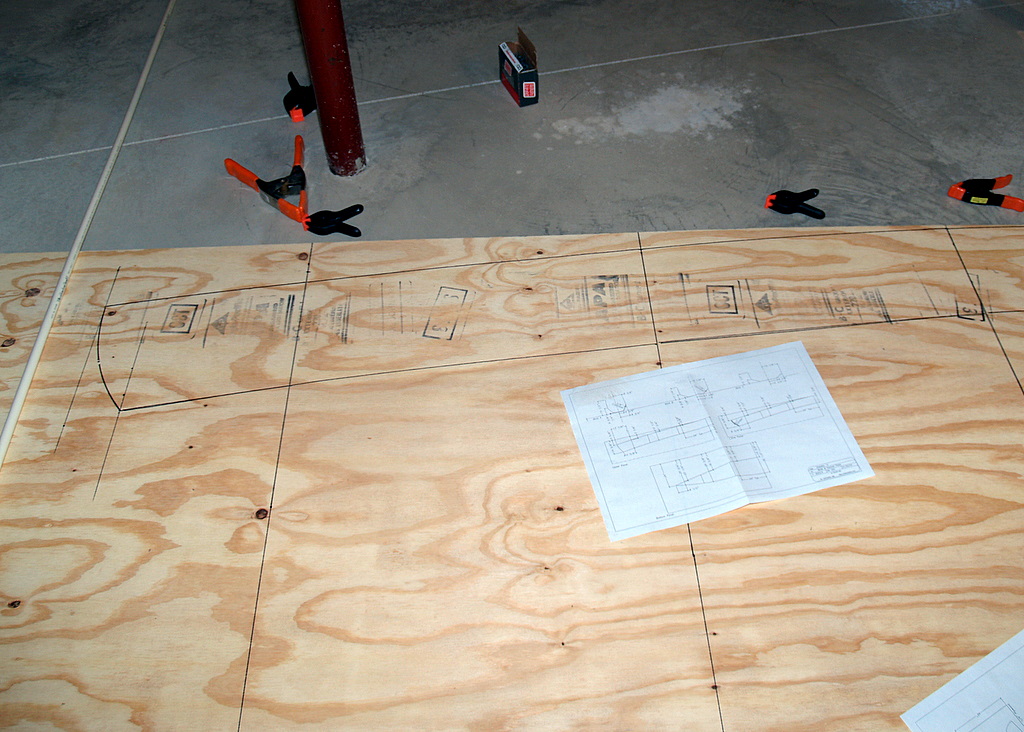
The next step will be to cut out three more of the side pieces and one more of the bottom piece. I’m going to use the parts I’ve already cut out as templates to draw the cut lines for the other pieces. Even with that, the parts will no doubt have slightly different dimensions because I am by no means precise when wielding the circular saw. I think when I get the rest of the parts cut, I’ll stack them up with their brethren and see if I can get them all into roughly the same shape by sanding the edges.
Posted in canoe on January 19, 2008| 3 Comments »
Ah, it’s Miller Time. As I sit here savoring an ice cold beer, I can still smell the odor of burning plywood permeating the entire house. I spent a few hours working on the canoe, specifically marking and cutting the first piece out of the plywood. Let me just start out by saying that I’m very glad that I’m not $300 into this wood!
The marking went well enough, but there was one instance of mis-measuring. I’ve taken to using the 1″ marking as the end of the straight edge because the 0″ mark (or the end of the straight edge if you prefer) is kind of dinged up and I don’t overly trust it to be true. The problem with this comes in when I forget to add an inch to the mark I’m measuring from. So, what ended up happening is that a mark that should have been at 3 3/8″ ended up being at 2 3/8″. The tip-off that something was awry came when the PVC pipe refused to make a nice radius. That prompted me to re-measure and find the problem. Once the first marks were in place (correctly), I nailed the PVC into place by pushing it against a nail pounded in at the mark and holding it in place with another nail on the other side:
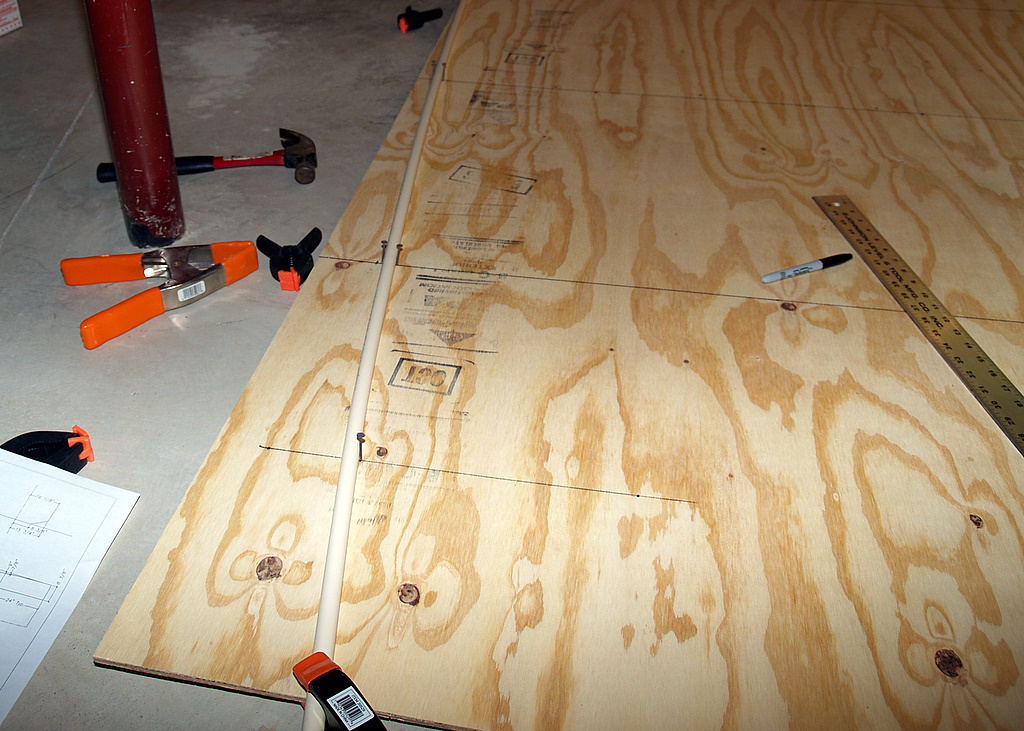
I simply ran a Sharpie along the edge of the PVC to make the line that I would (attempt to) follow with the circular saw.
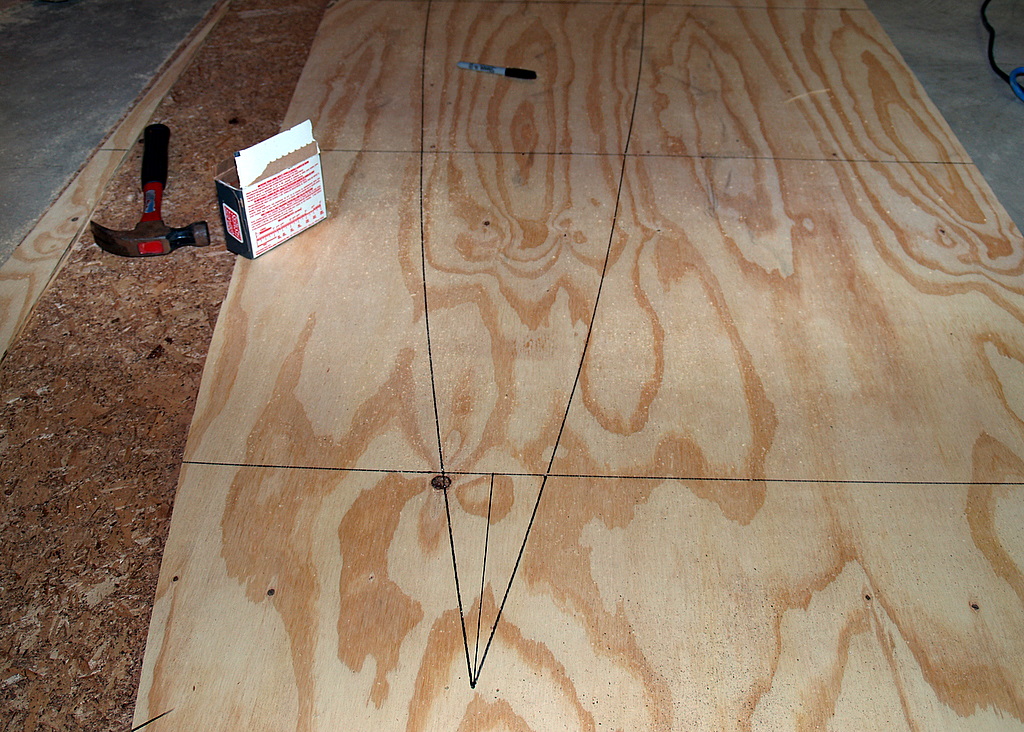
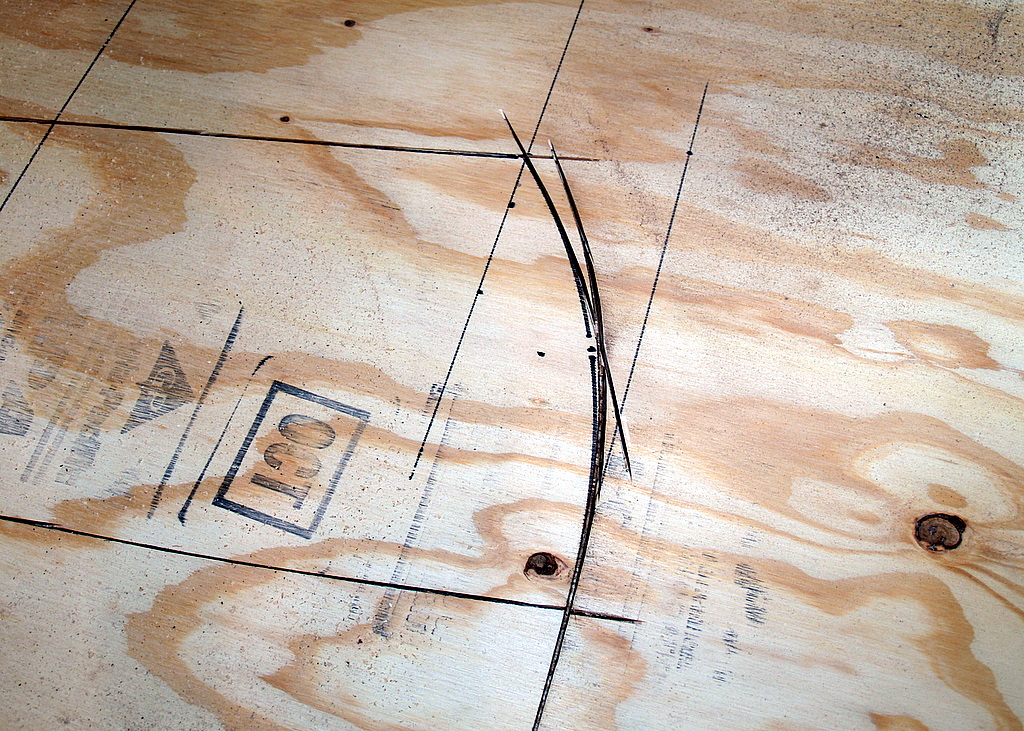
The bow has a one inch camber (mostly for aesthetic reasons, I think) that I drew by measuring half of the distance from the two front points, then measuring an inch from that line. I pounded a nail in at that mark, then tried to bend the PVC around it to get a good curve. The PVC was reluctant to make such a tight turn, so I ended up having to hold it in place while I drew the line. I wish I had a picture of what it took to do it, but since I don’t, just visualize a game of one-man Twister. I ended up with one hand holding the PVC, knees brought into play in various areas, and the other hand both holding the PVC and wielding the Sharpie. It all turned out ok, though:
The second long line was pretty much like the the first, but without the mis-measurement. That done, I was ready for the first cut:
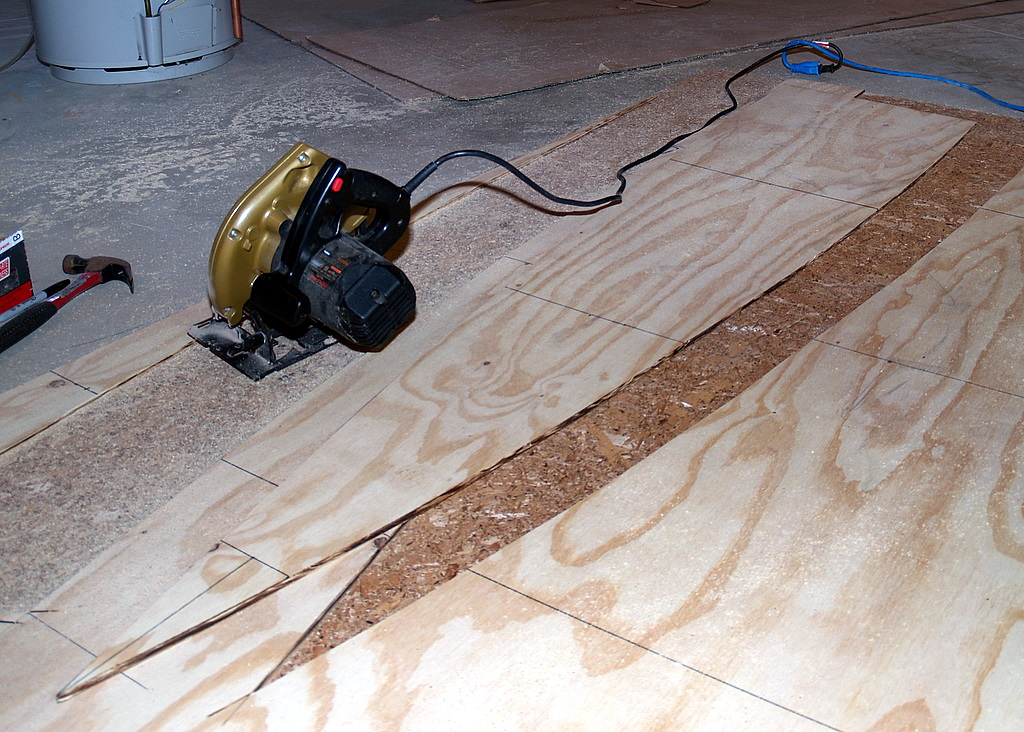
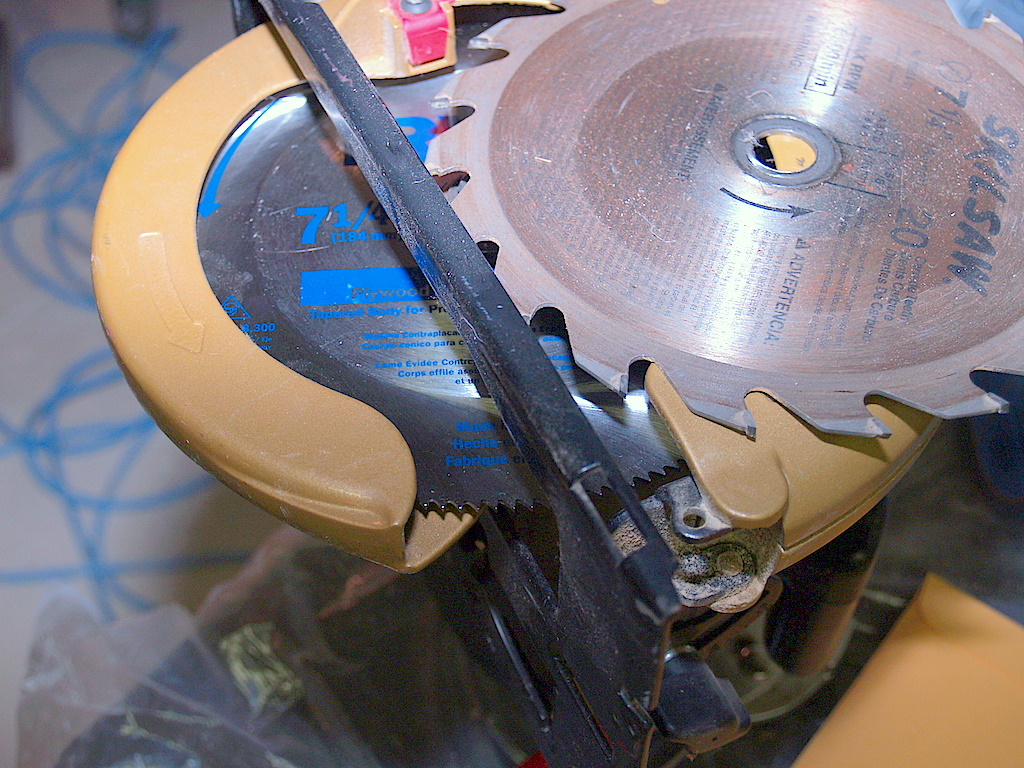
I set the cut depth on the saw at 1/4″, but for reasons running from the 150 tooth blade (versus the 20 tooth default blade) to the fact that this is the cheapest saw money can buy, it took no less than six adjustments to get it set at the right depth:
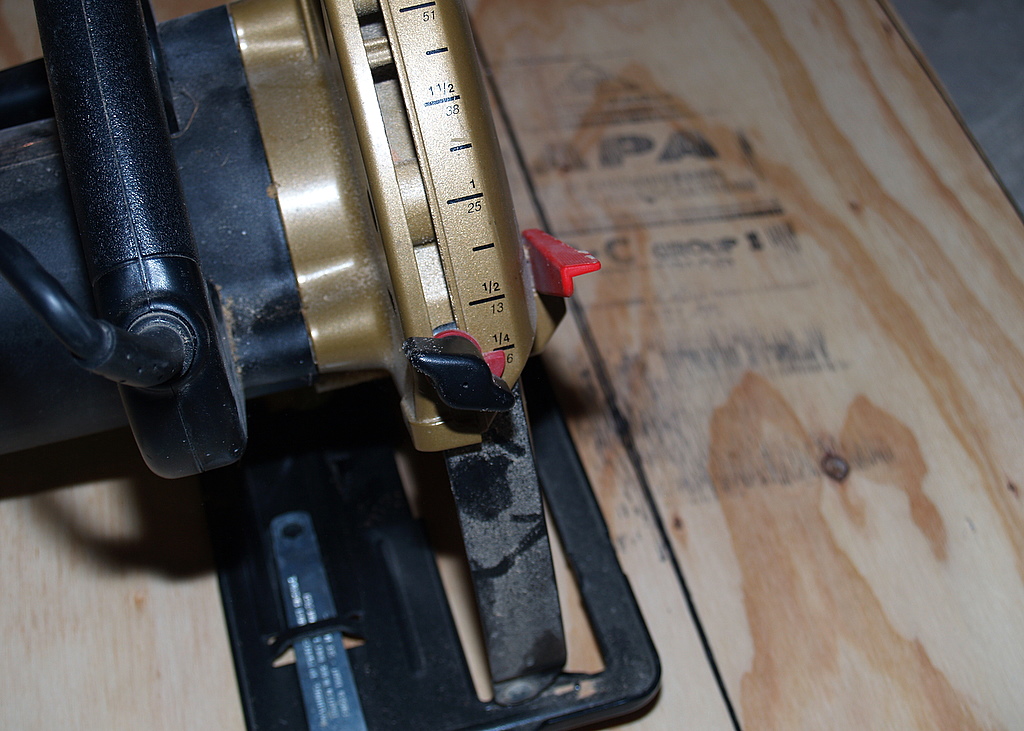
As I cut along the long edges, the saw would bog down whenever I had to follow the gentle curvature of the lines. I was pretty sure that this meant following the camber of the bow was going to be a real bear, and I was right. Even with the maximum turn that I could make (which is where the burned wood smell that I am still enjoying came from), I couldn’t get it to follow that tight of a radius. I ended up just doing it in two cuts:
With the blade depth set where I had it, I got all the way through the wood, but there were marks here and there on the OSB that demonstrated why I wanted to have it under there in the first place. Those were spots where the saw blade would have come into contact with the basement floor, and I really didn’t think that would be a good idea.
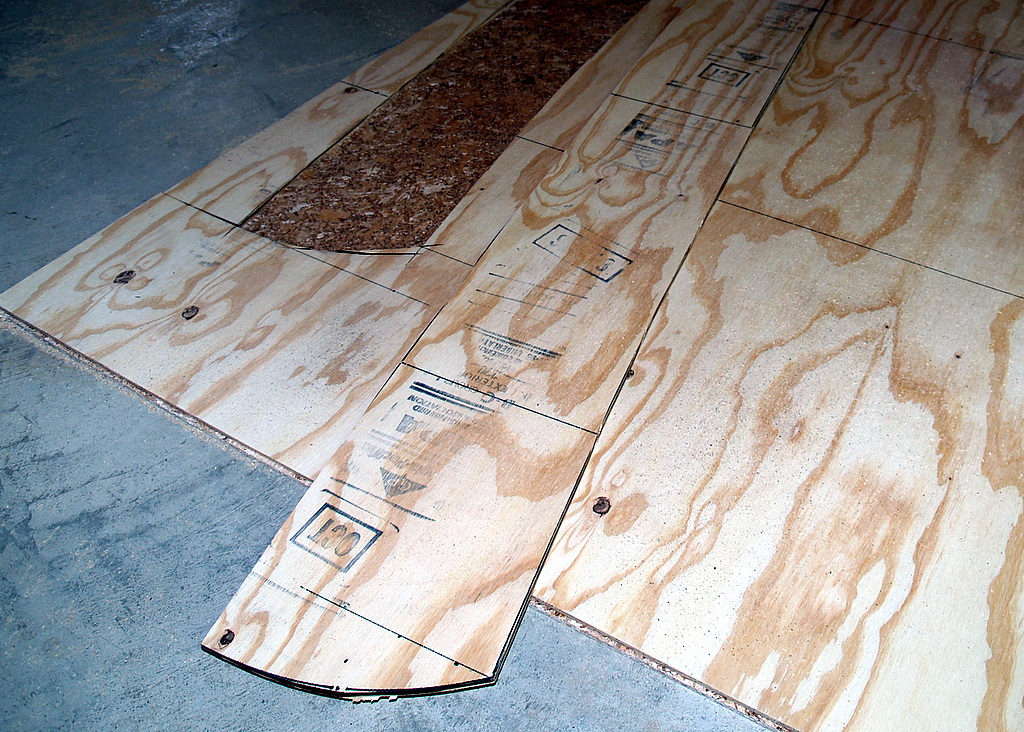
So, here’s the first part, all cut out:
Posted in AP School on January 18, 2008| Leave a Comment »
When I last wrote on the topic of A&P school, we had removed the O-320 from the Piper Cherokee in order to tear it down and see if we could determine why it was eating its sparkplugs. Since then, we’ve removed the cylinders and pistons, all of the accessories, and split the crankcase. We were careful to look for foreign objects in the cylinders and/or exhaust as we did so, but found nothing. What we did find was that in cylinders 1, 2, and 4, the pistons, the valves, and the inner surfaces of the cyliner heads were beat to hell and back. They look like an over zealous antique furniture counterfeiter went after them with a small length of chain. Every inch of the surfaces was nicked and scratched. If you imagine what it would look like if you tossed a hardened steel washer into the cylinder and ran it for an hour, you have a good idea of what condition these parts are in. And, we have no way to explain what happened!
We’re going through the instructional exercise of precisely measuring all of the innards, determining a multitude of arcane things like washout, rod bearing journal diameters, piston pin diamter, etc. before putting it all back together. With the limited budget the school has, there’s no way that they’re buying new pistons and cylinders, so we’re going to reassemble it with the ones we have and hope that it runs. The reassembly is not going to be easy; the same level of conscientious marking of parts and their locations that was exhibited when removing the engine from the airplane (which is to say “none”) went into its disassembly. Nuts, bolts, clamps, etc. are all neatly piled in abject disarray in a tin pan. It’s going to be interesting trying to sort all of that out!
Posted in canoe, Flying on January 12, 2008| 2 Comments »
We’re enjoying a bit of a respite from our normal depressing January funk this weekend, primarily due to unseasonably nice temperatures. I try to always take as good as I give, so if any of Al’s global warming adherents want to toss an “I told you so” in my direction, feel free; I’ll take it with a smile because, quite frankly, it’s a fair cop.
The forecasters promised calm winds and scattered clouds, and that’s what we got. The 35 degree temperature was no factor, easily mooted by dressing in layers of warm clothing. I’ve learned to wear multiple thin layers rather than a thick coat when planning on squeezing into the narrow confines of the RV, particularly on days when there are to be two souls on board. Co-pilot Rick was along for the ride, and the flight plan for the day was pretty routine: breakfast at Urbana.
The air was indeed calm, and as a consequence there wasn’t much actual flying to do, per se. We had a glass smooth ride, albeit through a bit of a murky sky. The visibility was around 7 miles, which is plenty when driving but on the hazy side when flying, particularly in the winter when crystal clear air is the norm. I had a surprisingly good landing, considering that December 26th was the last time I had flown. The good weather had prompted more than a few others to make the trek to Urbana for their morning repast, but most of them were already there when we got there so we didn’t have to deal with squeezing ourselves into a crowded pattern.
Despite my aversion to the name, I ordered “The Crosswind” from the menu. The Crosswind is two pancakes and the choice of ham, bacon, or sausage. I tried to avoid saying the name, mostly since I didn’t want to jinx the day, but ordering by number apparently only works in Chinese restaurants. The waitress noticed my reluctance to say the name out loud, so she actually made a point of saying “Here’s your Crosswind” when she brought it out. How she knew co-pilot Rick was picking up the tip today I’ll never know, but it’s a good thing for her that he was! I’m vindictive that way. (Just kidding – I spent enough time in the food service industry back when I was younger that I tip very well these days)
The trip back to Bolton enjoyed the same conditions, but it was a little harder to see anything since we were flying into the sun. It’s sunny/hazy days like this that make one wonder why in the world everyone paints airplanes white. They’re impossible to see in those conditions, so it’s always a little nerve wracking tooling along at 150+ knots knowing that you won’t be able to see any conflicting traffic until it’s too late. Thankfully, it’s a really big sky!
Co-pilot Rick brought his SUV today in order to help me bring home some canoe wood from our local Lowes. We sorted through the low cost exterior plywood, hoping to get a few good pieces. I think we rejected 8 or 9 before getting 3 that were at least suitable. I’m still convinced that I can craft a satisfactory canoe out of this wood, considering what it’s going to be used for, without spending $140 to ship $150 worth of high grade wood. It’s no surprise, though, that there is a tremendous difference in the quality of the wood I can find at Lowes versus the very nice Okume marine plywood that I used for the kayak. I’m willing to accept that.
You can see some of the knot holes and splits that I’m going to have to work around:
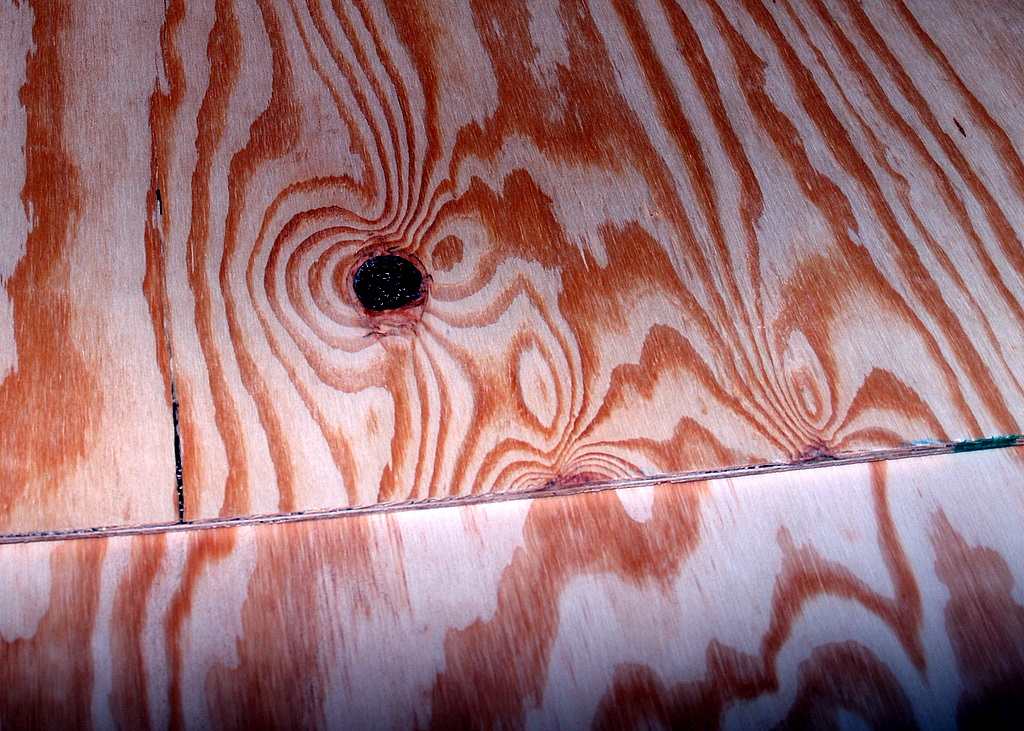
It also doesn’t sit very flat on the floor:
I’ll be able to work around some of that stuff just by being careful about where I place the pieces/parts, but as you can see from the nesting diagram, there’s not always a whole lot of wood that doesn’t get used at least somewhere:
I bought a few more things while I was at Lowes. The blade on my circular saw is too rough for the relatively precise cutting I need to do in the relatively thin 1/4″ plywood, so I bought 150 tooth blade:
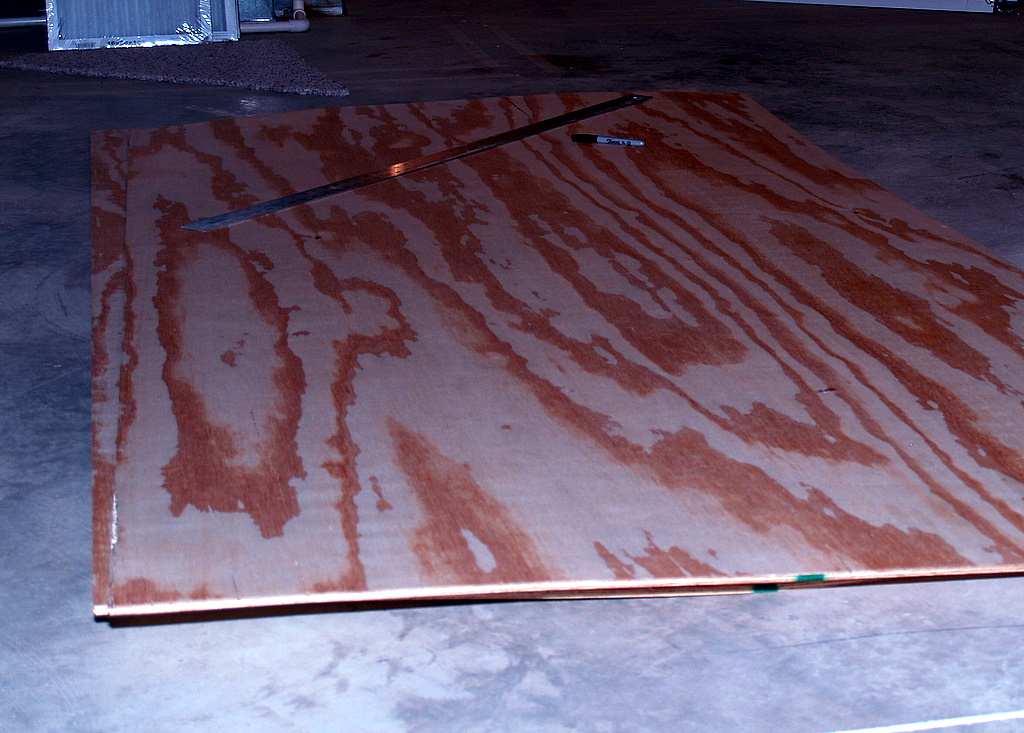
I would have settled for 100 teeth, but they didn’t have any of those. I’ve also been worried about where I’m going to cut the wood. It’s too flimsy to put up on sawhorses to cut, and the suggestion from the support forum on the web site is to just lay it on the floor and cut it. I’m afraid that it would be a near certainty that I would either have places where I didn’t cut deep enough, or would cut too deep and hit the concrete floor with the blade, an event that I’m guessing would be detrimental to all parties involved. I decided to pick up a big sheet of 1/4″ OSB to put under the plywood for cutting. This idea also had the salutary side effect of finally forcing me to decide if I’m going to shape the boat with spreaders, or if it would be better to use forms. With all of the OSB to spare, I’ll go with forms. I think that will be a more robust solution anyway – I think spreaders leave a lot more of the overall shaping of the boat to chance.
When looking at the plans, it took me awhile to figure out what the extra vertical lines in the sides of the boat were supposed to indicate. The lines that are dimensioned with ’24” Typ.” are the baselines for measuring the outline points that will be used to shape the pieces. Once I get the idea in my head of using forms, it became clear that the unmarked lines are the locations of the forms:
[Picture removed]
The forms are the parts labeled Mold A, Mold B, and Mold C at the top of the plans.
As long as I had the OSB to work with, I went ahead and put a couple of nails in it at random locations to see how well the length of PVC pipe (more like conduit, actually, as it’s pretty small diameter) would create a curve:

I think I have everything I need to get started with plotting out the cut lines on the wood and to go ahead and cut out the pieces. I had hoped that I could defer the purchase of the fiberglass and epoxy until I had the parts stitched together into the shape of the boat, but it’s obvious now that I can’t. The pieces get cut out and butt joined at their edges to make the full length pieces that will be required for stitching it all together. I’m going to have to break down and buy that stuff. The plans came with a $10 discount voucher towards that purchase, and with the free shipping (And, at the risk of being considered an ingrate, that probably means it will spend a few days languishing in Cincy), that’s a $128 nut. Nothing for it, though. Needs done.
Of course, there’s nothing to stop me from marking the 24″ baselines whilst I wait:
For them what’s keeping score, the cost of the saw blade, PVC pipe, and wood ran to $71.
Posted in AP School on January 10, 2008| Leave a Comment »
The class schedule has finally rolled around to the two things that I required before starting again: a subject interesting to a piston engine airplane owner, and a class not taught by the former instructor that I had so many problems with.
Class actually started Monday night, and one of the first topics covered was the syllabus. There has been a significant change to this class, as it turns out. This used to be the engine overhaul class, but the focus has shifted to maintenance. While I was initially a little disappointed in the change (I have been looking forward to tearing an engine apart for a couple of years), I soon realized that this is a very positive move. In reality, the chances of my ever overhauling an engine are so close to nil that they could safely be described as “never.” Maintenance, on the other hand, well, that happens all the time.
Tonight we got our team project assignments, and you can rest assured that I wasted no time volunteering for the three person team that is assigned to remove the O-320 from the Piper Cherokee and tear it down in an attempt to determine why it is destroying the electrodes of both spark plugs in the #1 cylinder within just a few minutes of run time. The first step was obvious: remove the engine from the airplane, bring it into the shop, and tear it apart. I had asked last year whether we would ever have the opportunity to remove an engine, and was told no. With the change in the focus of the class, that disappointing answer has obviously changed.
It turns out that removing an engine is fairly easy for three guys to do in just a couple of hours. I can safely predict, though, that it’s going to be one hell of a lot harder to put back on! The airplane was somewhat unfortunately located in the hangar – it was within a couple of feet of the drainage grates. Of course, I managed to get two washers to roll straight into the grates after dropping them. Like a magnet, I’m telling you, those grates are just like a big magnet!
We got the engine into the shop and removed the alternator, magnetos, vacuum pump, valve covers, and a good bit of the baffling (I’m baffled as to how I’m going to get a wrench onto the last nut, though – it’s a tight fit) before we ran out of time. The “tool” classes go a lot faster than those interminable lectures last year, and I’m looking forward to going back next Monday.
