Feeds:
Posts
Comments

Archive for the ‘canoe’ Category

As a public service for those readers that I just know are on the edges of their seats wondering about the status of various open issues, I hereby present a collection of updates:

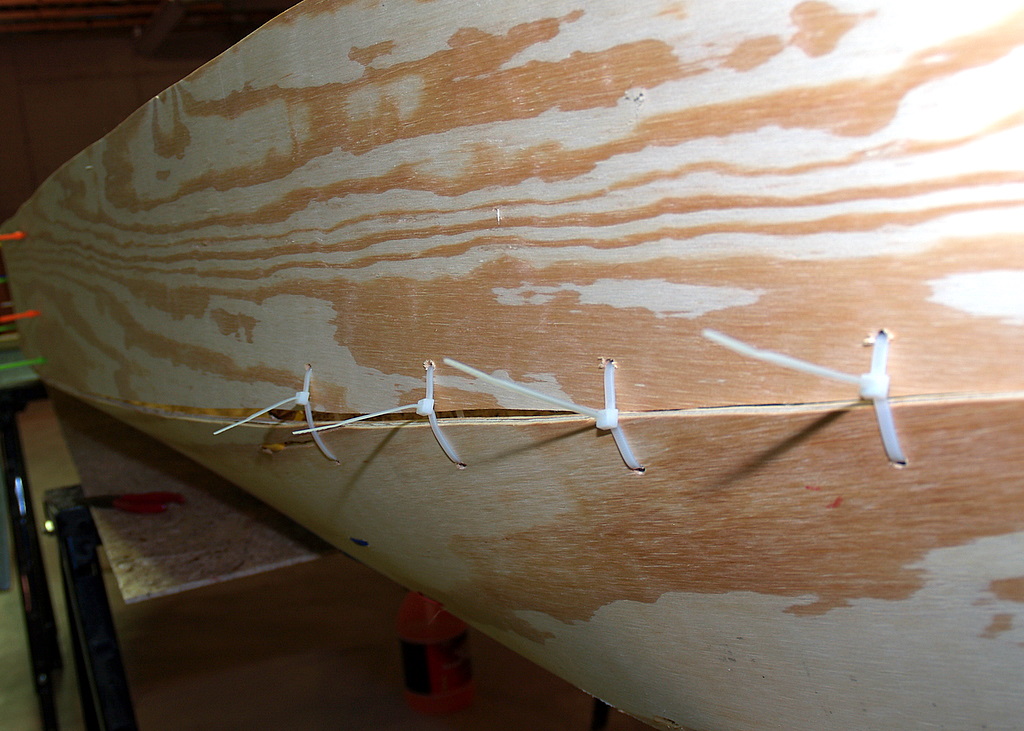
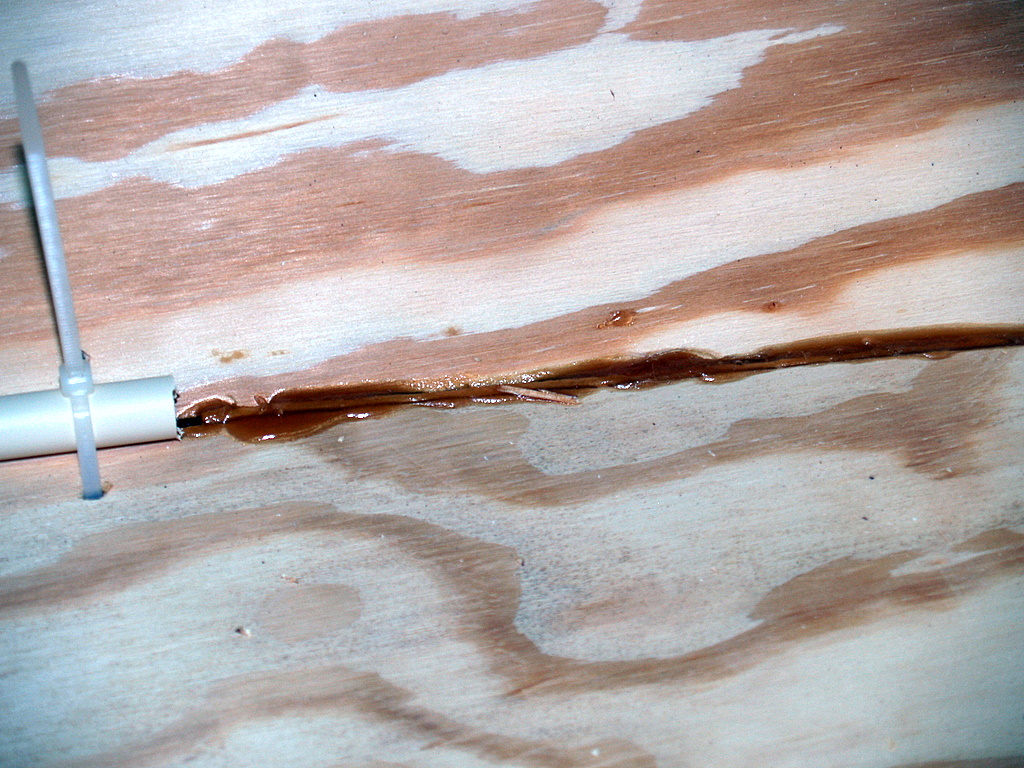
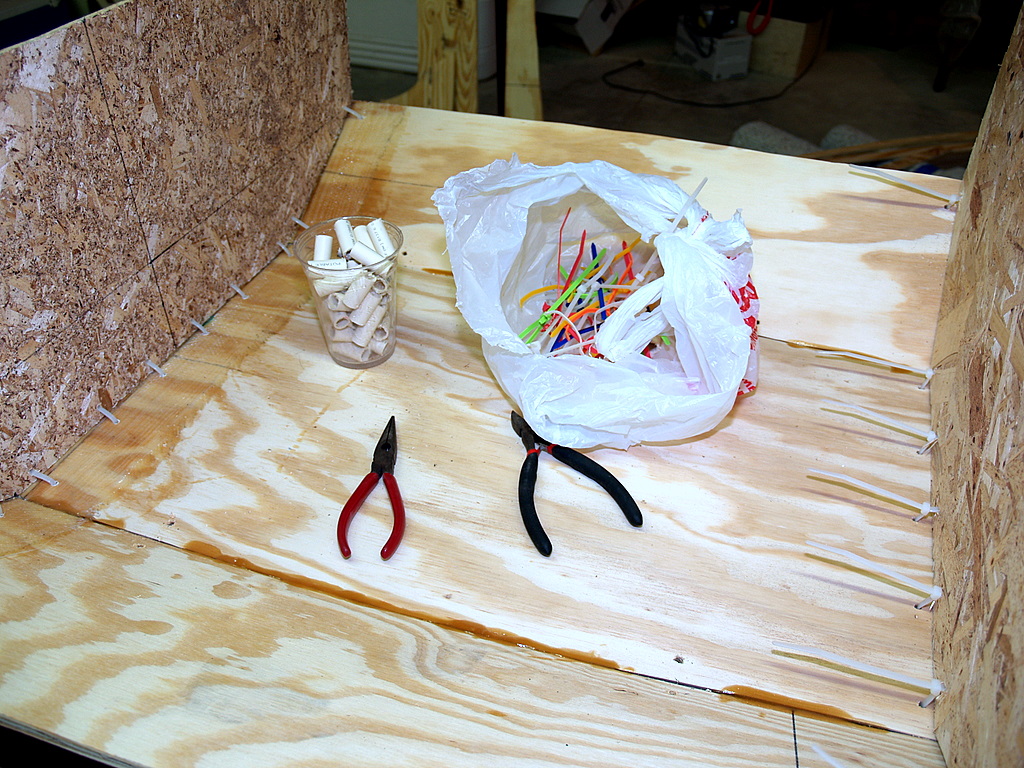
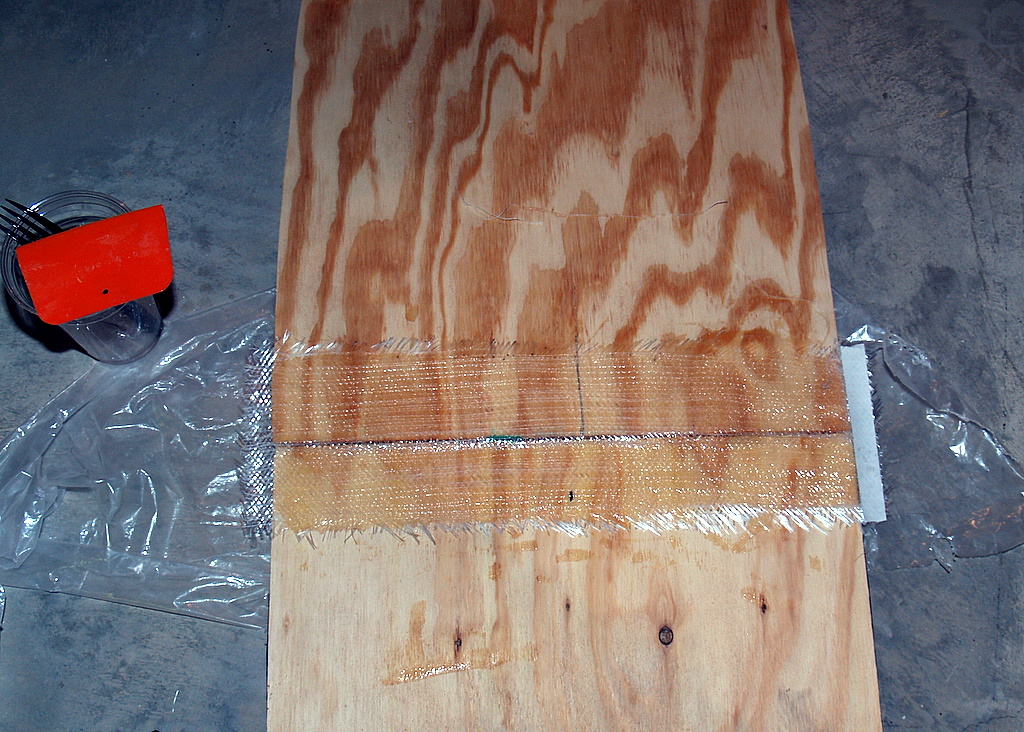
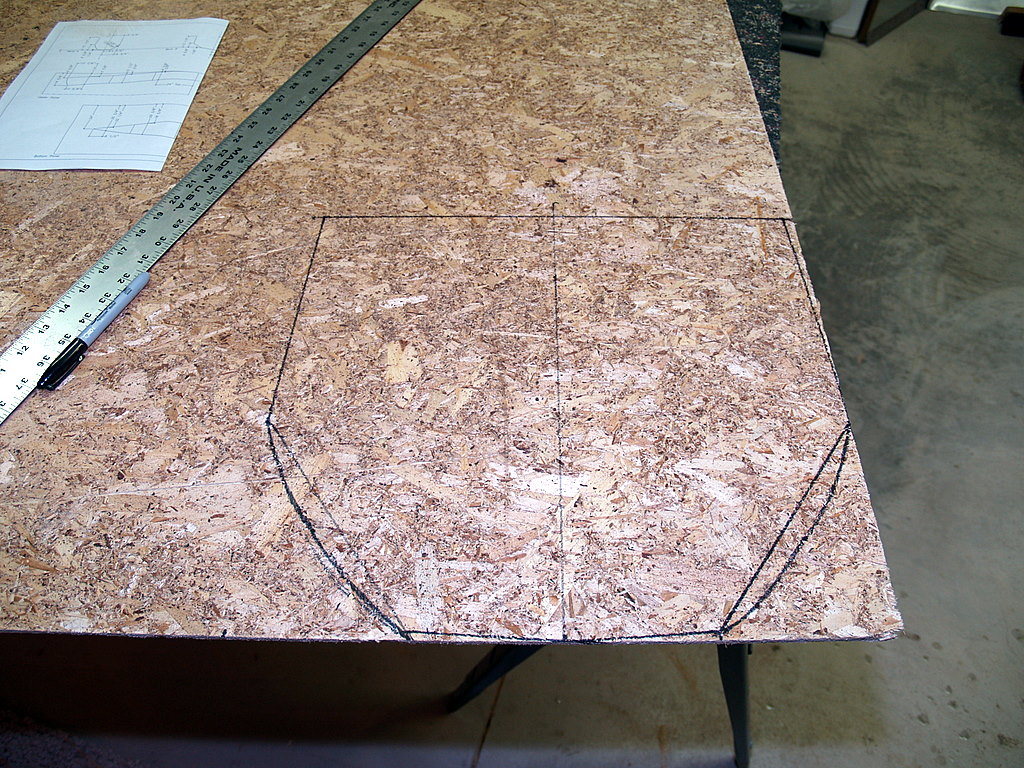
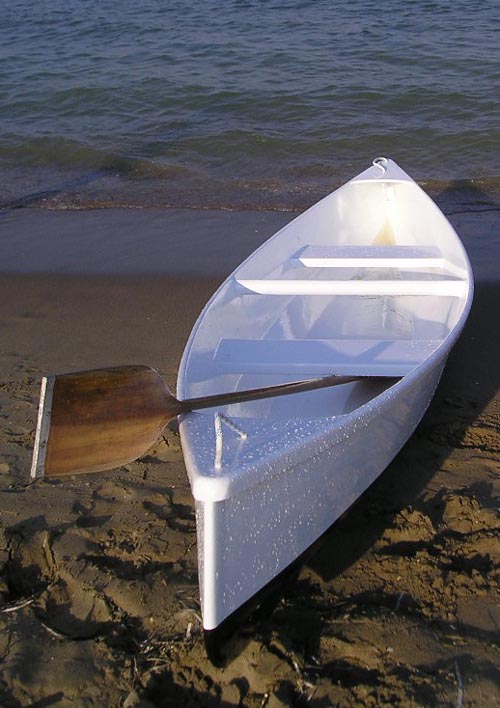
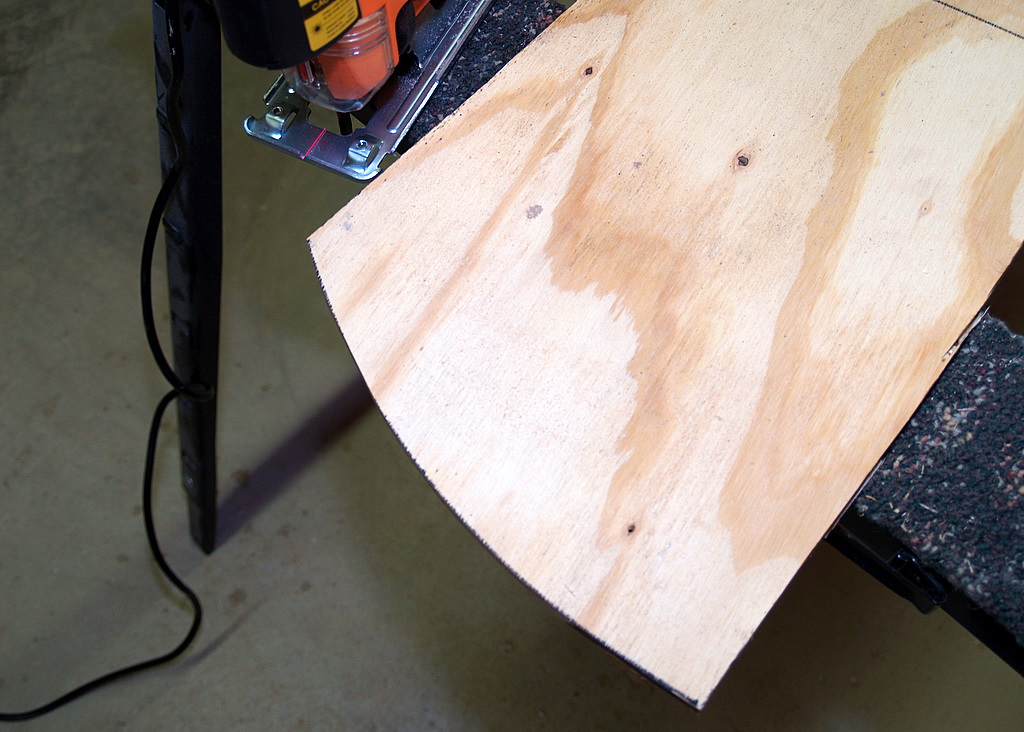
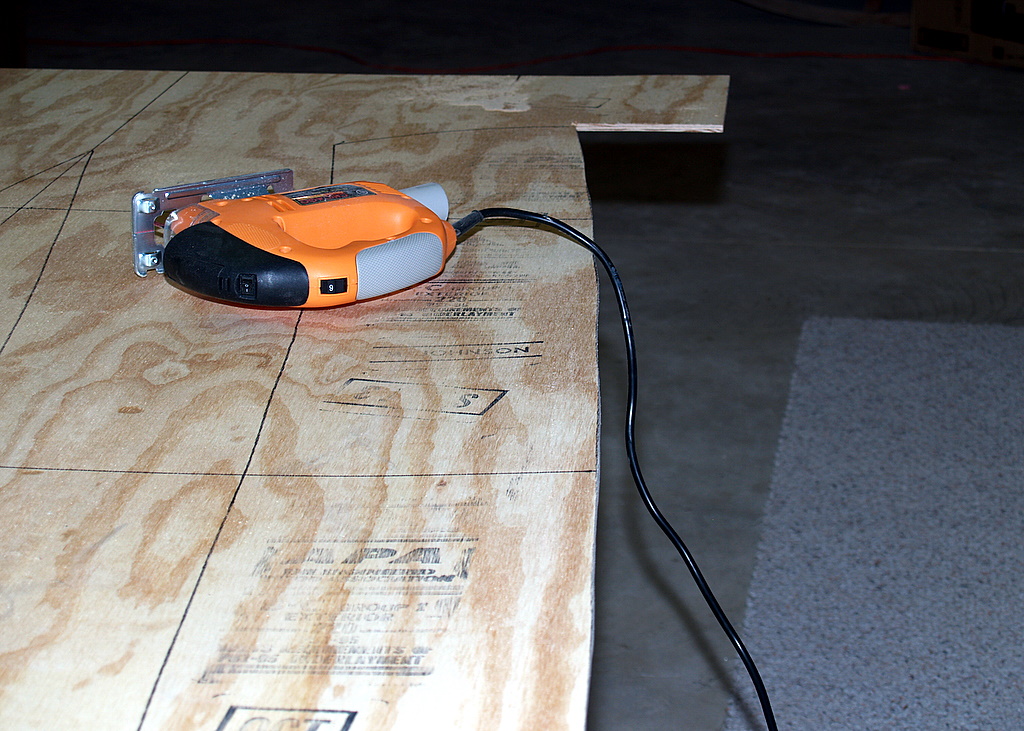
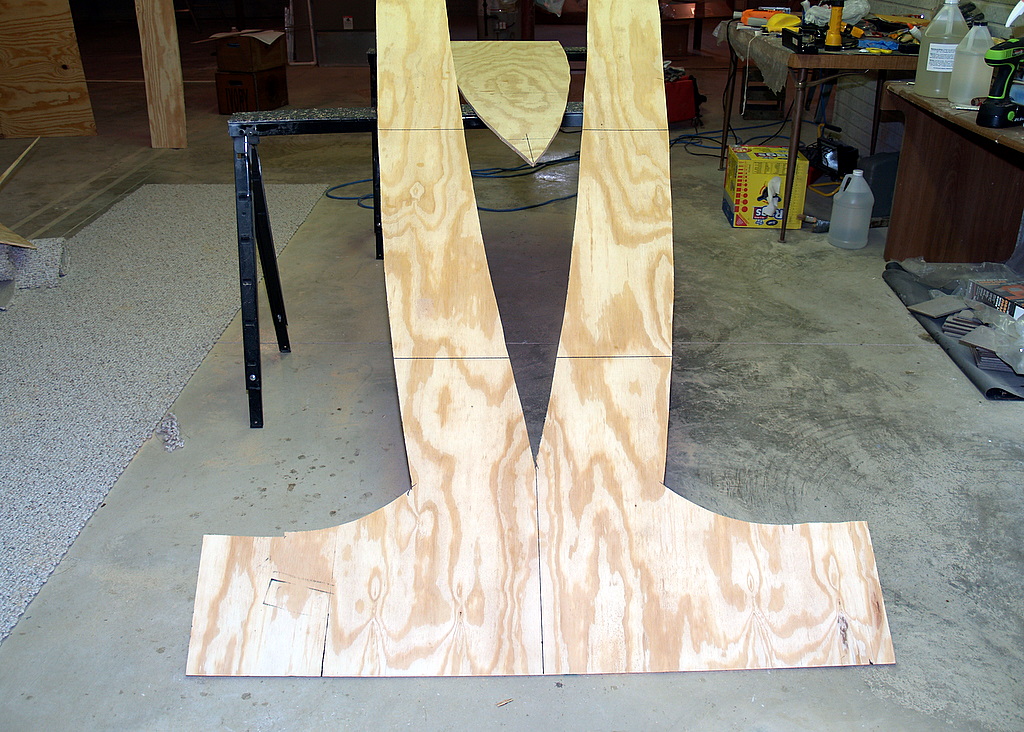
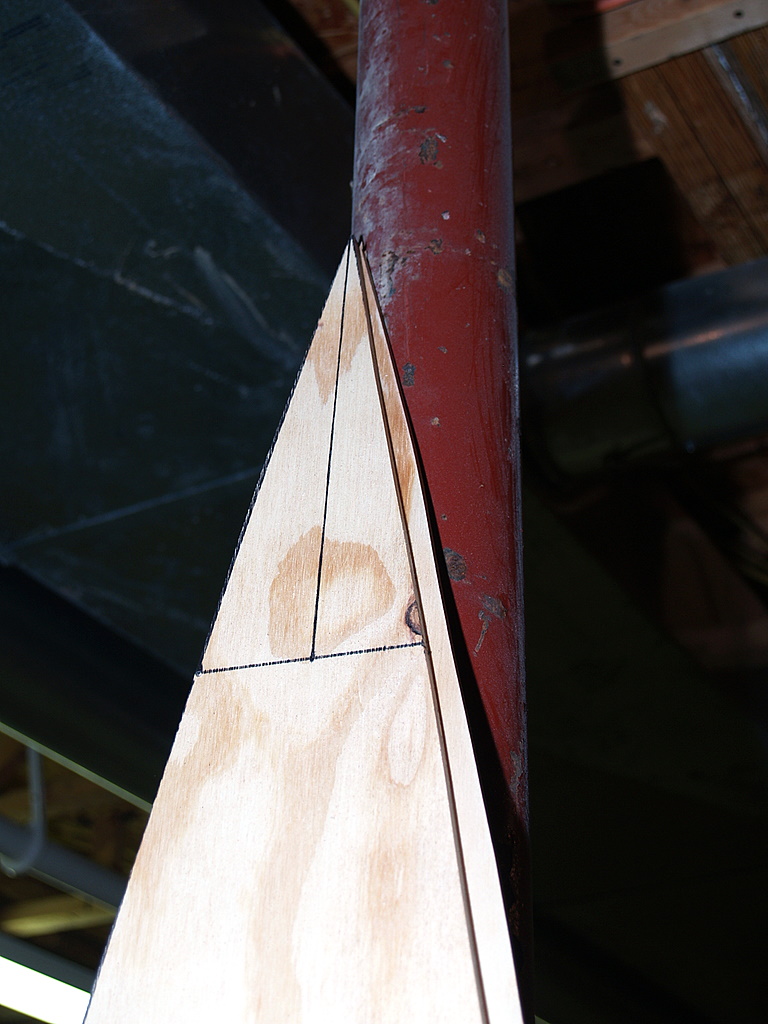
– the Canoe Project: when I last spoke on this topic, I was at a loss as to how to get the lower and upper side panels to meet. I’m not so worried about the gap between the two; the bigger issue is that I can’t get them flush. My efforts to rectify that had been concentrated on getting the lower panel to move inward to match the edge of the upper panel, but no amount of coercion could convince it to do so. I was down in the Boatworks a few days ago on an unrelated mission, and took the opportunity to take a fresh look at the problem. Now I grant you, this is going to seem painfully obvious in hindsight, but it appears that it will be quite easy to shim the upper panel away from the temporary bulkhead such that it moves outboard enough to line up with the lower panel. Yeah, like I said: “Duh!”

– the Miata: if you recall, it nearly left me stranded clear across town when the clutch wouldn’t disengage enough to allow me to get it into gear. I made an adjustment to the length of the clutch pushrod in order to get home, then stuffed the car back in the garage behind the snow plow and decided to just leave it there until, well, yesterday afternoon. I figured that maybe it was low on clutch fluid, so the first thing I did yesterday was pop the hood and check the level in the translucent plastic fluid reservoir. Which, thankfully, wasn’t back in the trunk with the battery. The level appeared to be mid-way between the Min and Max marks, but since I had needed a jump start again to get it started, I figured I could eradicate two avians with one projectile with a drive to the auto parts store to secure a container of DOT 3 brake/clutch fluid, which would also serve to push a new reserve of electrons into the battery. When I got back, I popped the lid on the reservoir, only to find it nearly bone dry. The reservoir was stained with the remains of fluid past, which presented a false level reading when viewed from the outside. Sigh.

– the Annual Condition Inspection: still waiting on the new gascolator. I ordered a new one from Aircraft Spruce last Friday, but cancelled the order when I received a very generous offer from an RV builder that had a gascolator that he would not be using. Many of you that attend Oshkosh each year will recognize the name of the donor, Mr. Bob Collins, as the driving force behind the annual BBQ. I had to renew the order for what turns out to be my old Model GAS-1 gascolator once I found out that the donated gascolator, a Model GAS-5, won’t fit the mount on my plane. That’s unfortunate because the newer model is much nicer than the old one, but I don’t want to have to refabricate the mount, at least not in the short term. Maybe when I replace the oil and fuel hoses later this year, though. In any event, thanks Bob!

– Shooting with my brother: finally having had all I can stand of the emasculating effect of showing up with .22 rimfires as he pulls out his gazillion caliber bazookas, I decided that I needed a grown-up rifle. But… I don’t hunt. I just like to make the thing go bang, and I like the mechanical precision of firearms. I enjoy the challenge of trying to consistently hit a target, and I like the congeneality I share with my brother when we have co-interests. With that in mind, you won’t be surprised to learn that I wasn’t keen on the idea of spending $600 – $800 for a new rifle. I have a friend at work that collects old military surplus guns, and he suggested that I look for one of those. I decided on a Chinese SKS. They’re commonly available at gun shows, moderately priced, and parts/ammo are cheap and also commonly available. I took it out and shot ten rounds through it last week to make sure it works, and found that it’s more pleasant to shoot than I had expected. It jumps a bit when you shoot it, but there is very little recoil that gets as far as your shoulder. In other words, you can shoot it all afternoon and not come home sore and/or bruised. I took a few pictures of it, if you’re curious:

http://picasaweb.google.com/HogarthKramer/SKS

It has a ten round internal magazine that loads through the top, but that’s kind of a pain in the nethers to do. I ordered a 20 round removeable magazine to replace it, and I found that it is much easier to load. Worth the $18. Oh, and if you must know, the gun itself was $265. They can be had far cheaper, but most of them at that price point look pretty ratty and run-down.

Read Full Post »

My temp worker made an appearance in the shop toady which is always welcome, but the results of our labor are not promising.

Being of the teenage girl persuasion, I was only able to procure slightly more than half of her attention, while the remainder was utilized in important telephonic discussions surrounding the topic of “boys”:

We were drilling the match holes that we would use to attach the first of the top side panels. The join did not go well, as you can see from the following series of pictures:

Those gaps are pretty extreme, and I have no idea what I’m going to do about them. I beat a quick retreat from the problem, hoping that some idea regarding how to get a better fit between those panels will miraculously pop into my head. I don’t think tie down straps are going to work this time.

Read Full Post »

Fillets and Glass

Earlier this week, I “tack welded” the edges between the bottom and the lower chine pieces. The idea is to get enough epoxy in place to hold the parts together without the aid of the plastic tie wraps. Because of the large clearances between the parts, the epoxy has to be thickened with sawdust (or to use the term on the side of the bag, “wood flour”) to keep it from just seeping through the gaps and adding to the already copious amounts currently adhered to my basement floor. It has to be thin enough to get down in the tighter gaps (what few there are), though, so it would still drip through and cause difficult to remove stalactites on the outside of the boat. To avoid that, I ran masking tape along the outside seams where ever I could see light coming through.

The epoxy/wood flour slurry also has to be thin enough to be loaded into the applicator, which in this case is a plastic hypodermic syringe:

I mixed the slurry in a plastic drink cup, and sucked it up into the applicator by sticking the open end into the mix and drawing it in by pulling out on the plunger. I then filled the gaps between the parts by injecting the epoxy mix into them:

Where the gaps were really, really wide, I trimmed some thin shims of plywood from some of the scrap left over from cutting out the larger pieces and stuffed them into the gaps before injecting the slurry:

I let the epoxy set up for a few days, mostly since the latter half of the week was pretty hectic and I never really had the time and/or energy to start on the next part. Today’s weather being what it is (read: crappy), I moved on to filleting the seams and covering them with fiberglass cloth tape. The tape doesn’t handle sharp angles well, and the fillets aid in that by providing a larger radius for the tape to work with. I suspect that the fillets also provide a bit more strength to the joints, but their primary purpose is to provide a good seat for the joining tape.

The epoxy gets mixed with wood flour again, but this time to a consistency almost like that of modeling clay. It is going to be pushed down into the seam and molded into the required shape, so there is no reason to it to be very thin. That consistency precludes the use of the syringe for getting it into the boat, though, so I used a different technique. With the filleting, I use a plastic kitchen storage bag with a tip cut into one of the corners, much the same way a bag would be used to apply decorative icing to a cake.

The first step is one of those that requires a pretty healthy dose of faith: cutting the tie wraps out. The faith comes in believing that the tack welds will hold and the whole boat won’t explode apart:

It held together, so I went ahead and cut the pieces of fiberglass tape to length:

This is one of the costs of using the OSB molds to hold the parts together. If I was just using spreaders, I would be able to do each side all at once. With the molds in the way, I have to work in the bays, and when the molds come out, I will have to go back and fill in the gaps. It’s a small trade-off, in my opinion, given the huge benefit the molds provide in the initial shaping of the boat.

With the epoxy mixed and squeezed down to the corner of the bag, someone needs to help by cutting the corner. I have an itinerant laborer that comes down to the Boat Works now and then to lend a hand:

It’s easy to then simply run a line of the thickened epoxy down along the seam:

When I did this with the kayak, I then used the end of a plastic spoon to impress the fillet shape into the epoxy. This time I just laid the glass into it and pressed it down into shape with a gloved finger:

I then mixed up a batch of unthinned epoxy to wet out the tape. This remains a job that I’d prefer to be able to hand off to Mike Rowe. The loosely woven fiberglass tape sheds threads easily, and they get strung along with the plastic spreader that I used to move the epoxy around. If I leave them there, I have to try to sand or scrape them away later. This being a canoe, there’s not even the opportunity to hide away the majority of my sloppy work like there was when doing the interior of the kayak. I got it done, but between the glass and the wood being very thirsty, I’m already starting to wonder if I will have enough of the relatively expensive epoxy to finish the job:

Mid-way through the wetting out, my laborer complained about the atrocious smell and left the Boat Works. I haven’t yet decided if it was the smell of the epoxy or that of the Chief Boat Builder, who had at the time not yet showered, that she was complaining about, and she won’t say. Smart girl, that one!

Read Full Post »

This blows

Today’s weather, that is. Mama mia, it’s 26 gusting 38! I’m not sure I could even safely taxi out to the runway in that! The temperature is just shy of balmy 20F, and with the wind chill it feels like being stabbed with icicles if you spend even the briefest time outside. At some point, it’s going to be hard to not take this kind of weather personally. What did I do, Al, what did I do? Bring back my global warming!

Like an old trail horse heading back to the stable at the end of a ride, once I determined that the weather was in no way flyable I pretty much found myself automatically heading down to the Boat Works. I found a bag of tie straps in the hangar this morning, so I didn’t have to brave the crowds at Harbor Freight to replenish my supply. They’re a bit garish, as you’ll see, but no less functional for that.

It was, as expected, quite difficult to get the bottom chines to come together at the bow. Between two ratcheting tie down straps, plastic tie straps every few inches, and copious amounts of swearing as I’d get to the end and find out that things just hadn’t lined up correctly and it had to be taken apart again for a do-over, I finally achieved this:

Unfortunately, some of the gaps between the bottom and the lower chines are still pretty wide:

Between the gaps and all of the holes that I’ve drilled for the tie straps, it seems that I’m going to be relying pretty heavily on epoxy and filler to keep the water on the outside of the boat. I think I may have to placard the boat against operation in anything deeper than 3 ft. of water for liability reasons.

It’s definitely starting to take on the look of a boat, though:

Here you can see the cost of the twist that I accidentally built into the bottom pieces:

In retrospect, it would have been better to use the bent PVC pipe to draw the curve on one side, then measure a bunch of points on the curve and transcribe them to the other side, rather than putting quite so much faith in the pipe to bend equally on both sides using points 24″ apart.

I can either cover that up and shape it nicer with epoxy, or sand/rasp/cut it down flush. Or, more likely, a combination of the two. The other end will probably look just as bad. I won’t know about that today, though, since I intend to spend a few days recovering before going through the same chore again.

Read Full Post »

A stitch in chine saves nine

I started stitching the lower chines to the bottom tonight. I started in the middle and worked my way to the fore and aft, alternating between the left and right side. The plans suggest spacing the holes 12″ apart, but I just guesstimated that by looking to see where it seemed that it would do the most good to snug up the edges:

I’ve been cutting short pieces off of the PVC pipe that was formerly used for drawing the curved lines on the plywood for cutting out the parts and putting them inside the loop formed by the tie straps. That seems to give the tie strap a little more leverage for pulling the edges together.

You can see where my early efforts at cutting a straight line with the jigsaw introduced problems:

That gap will get filled with epoxy thickened with saw dust and then covered with fiberglass tape, so it’s really not a problem.

Just as I was getting to the bow and stern, both of which are really shaping up to be a royal pain to get together, I ran out of tie straps. (I used way too many to put the molds in place, I think.) Since I won’t be able to get more until tomorrow (Harbor Freight on a Sunday – Ugh!), I thought I’d see if I could get the wood at the bow and stern to take a bit of an appropriate and helpful bend. We all know what it means when I have recalcitrant wood unwilling to bend to my will, don’t we? Yes, of course we do! Tie straps:

This is a neat time in the build in that you can see the boat starting to take shape. I think it’s going to be a long and frustrating job to get the sides to align with the bottom and to also sit snug against the molds, but when it’s done the boat will (well, should) have the characteristic lengthwise bend of a canoe.

Meanwhile, back in the far reaches of the boat works, the upper sides have the first epoxy/fiberglass patch joining them together curing. The second join will get done tomorrow morning.

Read Full Post »

Will I ever fly again??

The Weather-out-the-Window(tm) forecast looked foreboding at first glance: it was grayer than a South Carolina Civil War re-enactment. After a half hour or so, though, the sun started breaking through the sludge, prompting me to head for the computer to get a real, FAA-blessed forecast. Aw, shucks: winds are 14 gusting 24. Too rich for me, I’m afraid.

As is becoming my habit, the next stop was the Blue Heron Boat Works, there to continue on the canoe build. With the bottom and lower side chines having been epoxied together over the last couple of evenings, it’s time to start stitching them to the molds. I started in the center, mostly because that is the only one that I will be able to precisely locate. The others will require a little fudging back and forth to find the spot that best fits the width of the bottom edge of the molds. This location is shown on the plans, but with the imprecise way that I measure and cut, those are effectively just suggested locations.

So, placing the middle mold on the join line between the bottom halves and drilling holes for the tie straps resulted in this:

Pushing the tie straps down through the top and back up from the bottom:

The middle mold in place:

And, as they said on the Gilligan’s Island song before the Professor and Mary Ann re-negotiated their contracts, “and the rest”:

The next step is to drill the side chines and loosely stitch them to the molds. That job is already showing the hallmarks of being a real bugger. At least the weather is good enough to get the Miata out for some much needed exercise, so I’m taking a break:

Read Full Post »

With this epoxy, I thee wed….

I joined the halves of the bottom and chines tonight. The fiberglass cloth that was specified for the canoe is a much looser weave than that used on the kayak. It wets out easier, but it also sheds threads from the edges far more prodigiously, making it a bit of a hassle to work with. It will leave ugly edges, I imagine, but I don’t think it will matter as much on this boat as it did with the furniture-grade kayak:

The wood is pretty warped, so it took a bit of weight to hold the edges down:

I learned from the kayak that when I use those little floor tiles (you can see them on the far chine), I have to put the smooth side down. The side of the tile that goes towards the floor underlayment has a grid pattern in it, probably to give the glue something to grab hold of. When I used that side on the epoxy when joining the kayak parts, it quite predictably left a grid pattern in the epoxy. It wasn’t very easy to sand out. Not very easy at all. Funny how that tends to help reinforce a learning experience, isn’t it?

Read Full Post »

Super Bowl Canoe Sunday

Yet another gray and lifeless day, so no hopes of flying. Thank goodness I have the canoe to work on!

I’ve been marking and cutting out the forms (the plans call them ‘molds’) now that I’m done using the sheet of OSB as a protective layer for the floor. It turns out that the idea of buying a Lazarus board to first protect the floor, then morph into an integral part of the build process was sound in principle, but it may be the case that OSB wasn’t a great selection, albeit a fiscally responsible one. I’m afraid that the OSB may not be strong enough to use as a fulcrum for forcing the requisite bends in the pine plywood.

I noticed two things when cutting it: merely the threat of a blade is enough to make it decompose in fear, and it smells suspiciously like Corn Flakes when being cut. I’m not sure exactly what this stuff is made of, but recycled wet paper towels is high on my list of possibilities.

In any event, the forms are all cut, and I propped them up in place with this, that, and t’other stuff lying around the basement. So here, for the very first time, is a 3D representation of what the boat will ultimately hopefully look like:

Here’s a reminder as to what it is that I’m trying to achieve:

I’m almost to the point where I can start stitching it all together. The one remaining thing to do before that is to butt all of the long parts together and fiberglass them together. I’ll probably do that this afternoon before the big football game commercial extravaganza.

Read Full Post »

Press Release

From: Blue Heron Boat Works, Dept. of I’ll Believe It When I See It
Subject: Canoe Pieces Cut
Release Date: *** For Immediate Release ***

The Blue Heron Boat Works has release the attached photo showing the major pieces of the in-work Hiawatha 14 Canoe:

A spokesman for the company stated: “These are the pieces of our latest project, a Hiawatha 14 Canoe. According to our Chief Engineer, these pieces will allegedly take the form and shape of a canoe when stitched together. Personally, I will believe it when I see it.”

Read Full Post »

I cut out the second upper panel piece of the canoe today, again using the circular saw. This cut did not go very well. The blade kicked back a couple of times, resulting in nasty edges like this:

Again, I’m sure glad I’m not working with $300 worth of wood!!

The blade retention nut also worked its way loose again, which besides being somewhat scary interrupts the cut and causes another rough spot in the edge when I start again. When I got to the bow, I just made a rough cut, thinking I’d go back with the jigsaw and clean it up:

That worked very well:

As I was trying to hand sand away the messy edge the circular saw had made, I got to thinking that it really strains credulity that the jigsaw could possibly be any worse, and that I ought to give it a try on the next piece:

As you can see, the fear of a wavy edge was well founded, so I anticipate using every bit of the 1/4″ latitude promised by the designer:

On the plus side, in addition to being marginally easier on my aching back since I didn’t have to get down on my knees and fight my way down the cut with a recalcitrant circular saw, the jigsaw made a much cleaner edge and a lot less of the burning wood stench I get from the circular saw. Well, to be fair, the cleaner edge aspect only lasted right up until I got to the last inch of the bow and the part broke away because I hadn’t thought to go back and support it with the sawhorses as I cut past them:

That was easily remedied, and I learned a lesson about supporting the part better as I cut. Well, partially learned the lesson, anyway, as we will soon see.

The edges from the jigsaw cut are a bit wavier than the circular saw edges, and it remains to be seen if this is an acceptable trade-off for the cleaner, easier cut:

So, what did I mean about only partially learning the lesson of moving the sawhorses to support the areas that I had already cut? Well, I sure didn’t see this coming, did I:

When I lined up the two bottom pieces, I found that something had gone horribly awry somewhere:

When I flip one of the pieces over they match far more closely, so the error is not in the tracing or cutting, but in the initial measuring or outlining. I can go ahead and build it this way, but the boat will most likely have an inherent banana shape to it. I’m tempted to do it anyway since 1) it’s within tolerance, and 2) just to watch hilarity ensue as Co-pilot Egg struggles to figure out why she can’t keep the darn thing straight! Actually, stretched across a 14′ boat doing 3 mph, I’m not sure it will matter very much. Decisions like this, in a nutshell, are why I should probably never build an airplane!

Read Full Post »

Older Posts »